Young Huang, UX Designer at Product R&D Division, Moldex3D
In the actual manufacturing process, flatness is often used for product quality evaluation. If the flatness of a connector is too high, for example, it means the product has severe deformation. Thus, a poor connection might occur at the metal contact during use. For a cell phone shell, if the flatness of the inner surface or the inner component surface is too high, the assembly space will not be enough, and part interference and part loosening issues will occur. For a lens module, the uneven surface will lead to poor photographing quality. The jig flatness of the head-up display reflector is important since it will affect the deformation during the vapor deposition process. Therefore, flatness prediction, especially early in the design phase, is very important for the manufacturing process.
The computation of flatness uses the least-squares method to calculate the best-fit-plane of the specified area after deformation, and then find the two planes that are parallel to this best-fit-plane and completely contain the measurement area. Find the two planes with the least distance to meet this condition, and that distance is the flatness of the measurement area (Fig. 1). Flatness is used to measure the effects of warpage on the plane, preventing product defects caused by deformation. Thus, potential failure during mass production can be reduced. If too high flatness values are measured for the contact surface between the product and other objects or the assembly surface of the mating parts, the product might not be able to be placed horizontally or assembly issues may occur due to severe deformation.

Fig. 1 The definition of flatness
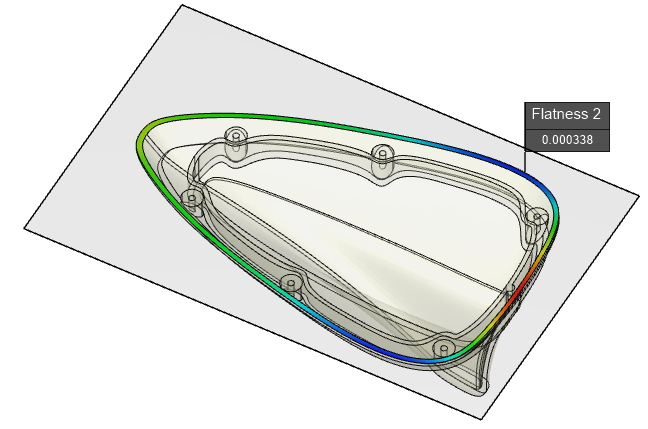
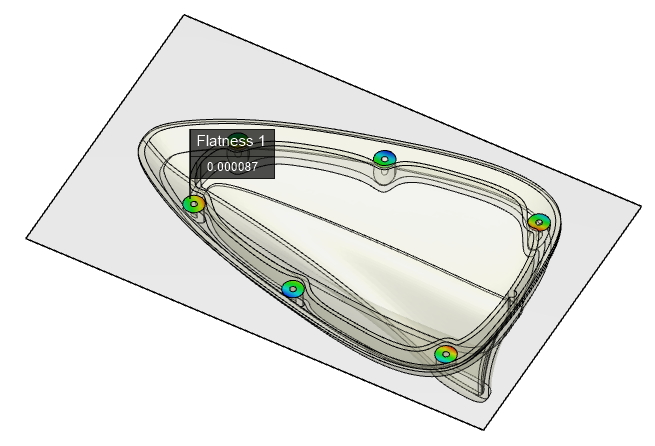
Moldex3D Studio supports flatness evaluation, enabling users to evaluate if the product flatness can meet the standard so that the yield of production can be increased, and the mold modification cost can be reduced. Using an automobile antenna as an example, if the criterion is for the product frame to fit the plane, we can measure the flatness of the frame to ensure the frame deformation within the tolerance scope (Fig. 2). For an antenna cap screwed to a plane, we can measure the flatness of all of the stud surface to check if the flatness of each stud surface is consistent and ensure the contact surfaces do not deviate too far from the surface(Fig. 3).

Fig. 2 To measure the flatness of the antenna cap frame

Fig. 3 To measure the flatness of the stud in the antenna cap
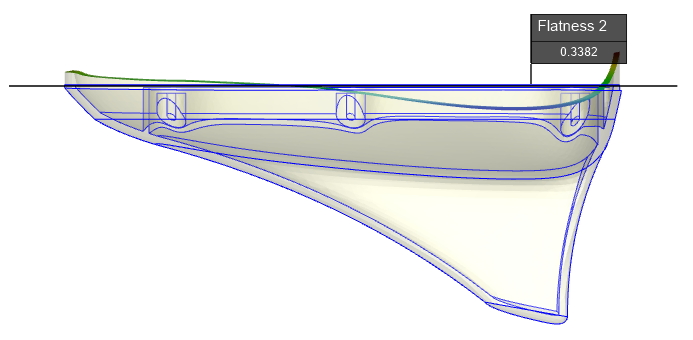
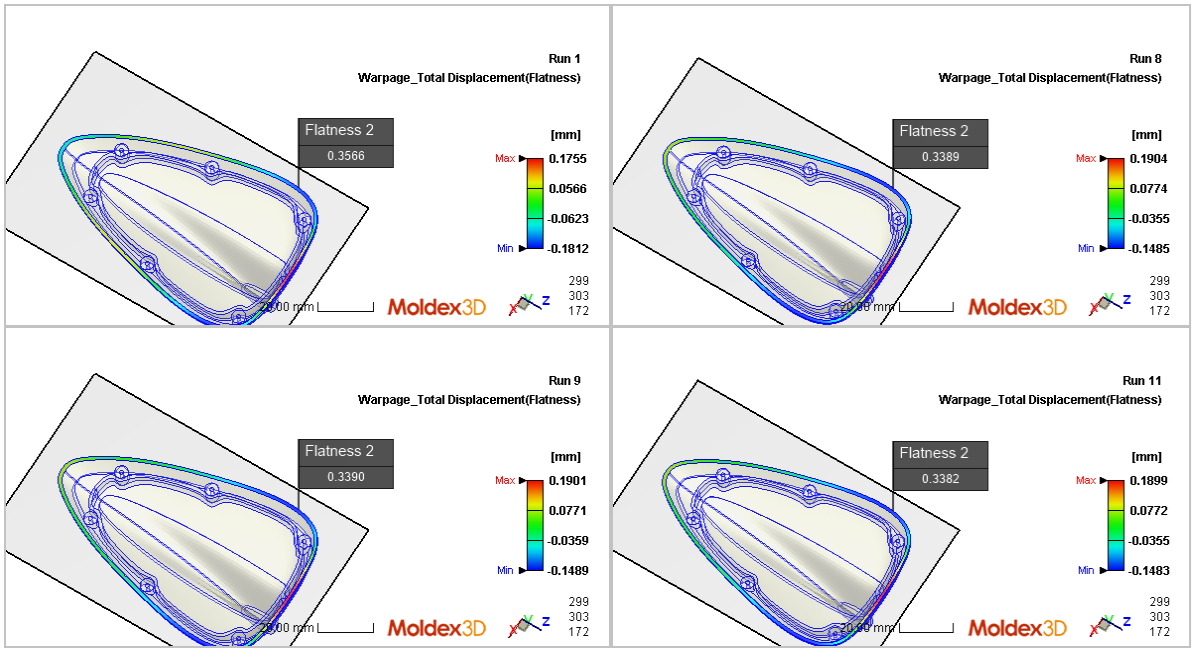
Then, users can view the flatness deformation trend by magnifying the deformation with Moldex3D’s Deformation analysis feature (Fig. 4). Moldex3D Studio provides a convenient flatness measurement feature for users to compare the warpage flatness from each group (Fig. 5) so they will be able to find the optimized molding parameters and effectively reduce the manufacturing cost and risk.

Fig. 4 Use Moldex3D Deformation feature to magnify the flatness deformation
