Authored by Stephen Chung, Deputy Manager of Product R&D Division, Moldex3D
Gas/Water-Assisted Injection Molding (GAIM/WAIM) process has been developed for the benefit of better product quality as well as material, cost, and product weight reduction. During the gas/water injection stage, the gas flows through the hot core of the thick sections and will empty the core of the product. The process is commonly categorized into two different methods: Short-shot and Full-shot methods.
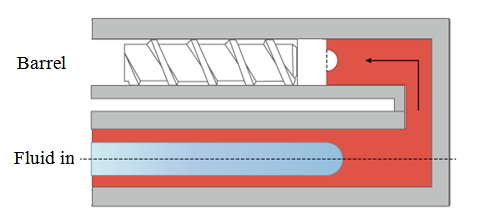
The Full-shot Push-back process allows pushing melt back to the nozzle from the cavity during the gas/water push-back. Applying the Push-back technique, there is no need for an overflow region, and, the push-back plastic melt can be reused. Thus, a significant amount of plastic can be saved. The Push-back process can also help avoid defects such as flow marks in the regular GAIM/WAIM process.
Moldex3D supports the simulation of the Push-back process in the GAIM/WAIM project for users to design the melt and fluid inlet to optimize core-out performance. Moldex3D also helps estimate the potential defect at the early design stage, while, at the same time avoiding the risk of gas/water from entering the barrel. The following step-by-step tips will demonstrate how to perform a GAIM/WAIM simulation with the Push-back process involved.
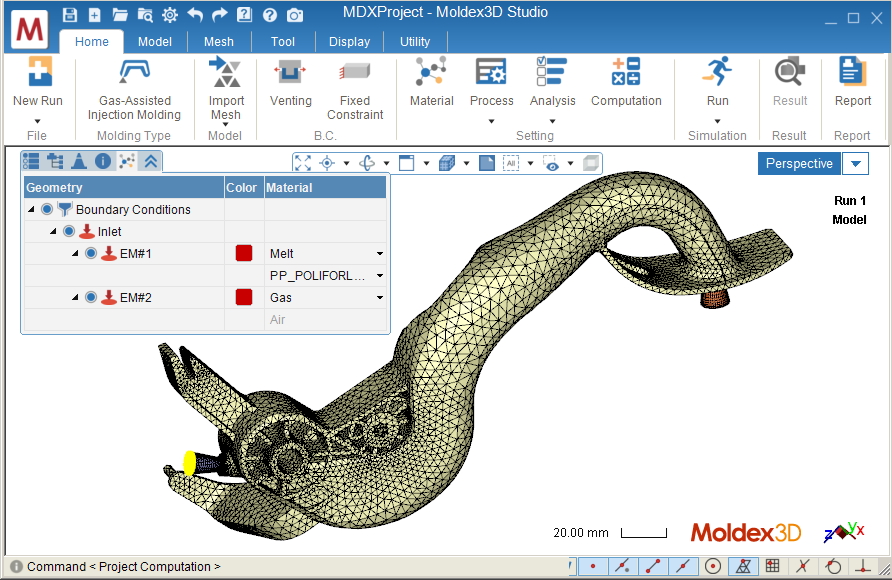
Step 1: Create a GAIM (or WAIM if using water as the assisting fluid) project in Moldex3D Studio and import a model (MFE) with at least two inlets for melt and gas. The inlets are usually on the two sides of the part for the Full-shot Push-back process. Select the melt inlet, gas inlet, and melt material and Moldex3D willgenerate the default process conditions and computation parameters.
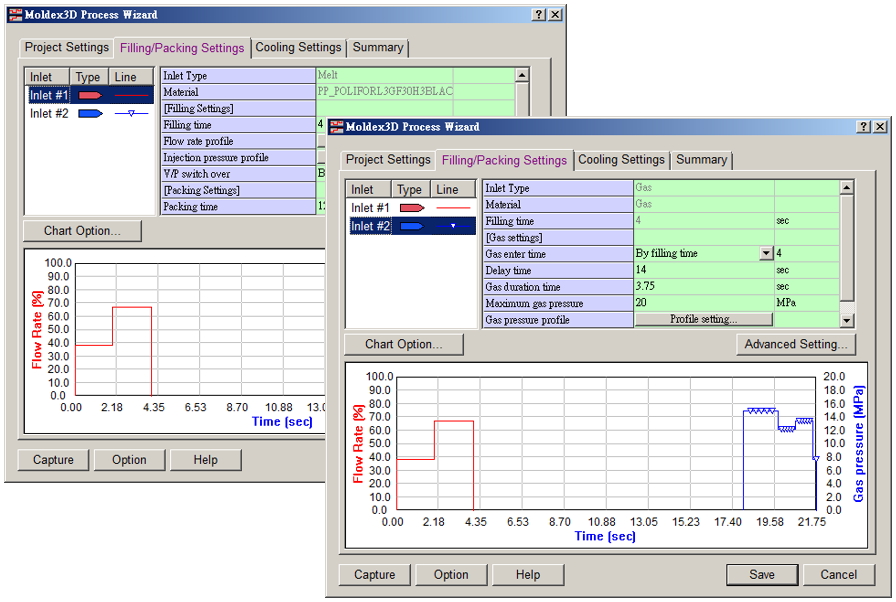
Step 2: Click Process on the Home tab to launch the Process Wizard. In the Filling/Packing Settings tab, specify the Filling, Packing, and Gas Settings to decide when and how melt and gas enter the cavity through the inlets (similar to the regular IM simulation).
Note: The Push-back process is a technique applied with the Full-shot method, so make sure the assisting fluid enters with the cavity nearly full.
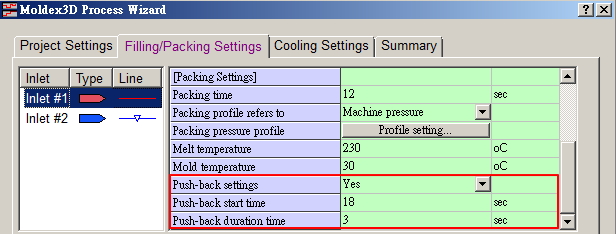
Step 3: Under the Packing Setting section of the melt inlet, select Yes in the Push-back settings to enable the Push-back process simulation. Then, specify the value in Push-back start time and Push-back duration time for when and how long the nozzle will open and let plastic melt flow back.
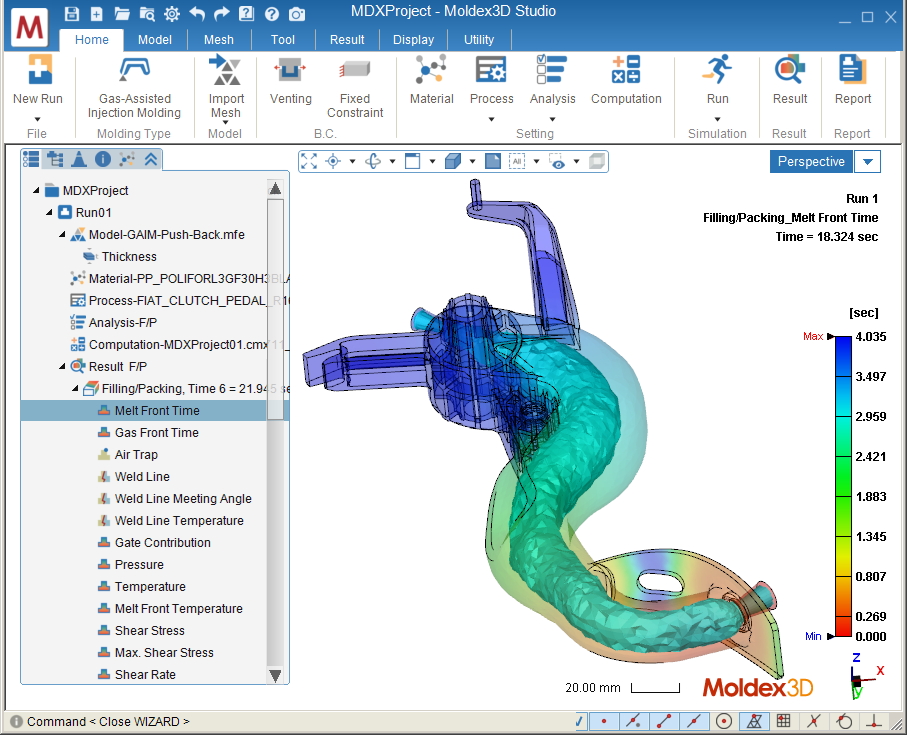
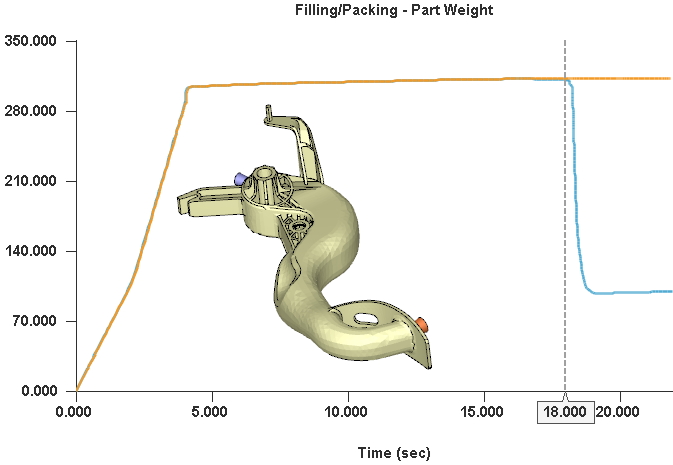
Step 4 Finish other analysis settings, and select Filling & Packing (F/P) as the Analysis Sequence and submit it for calculation. After the calculation is completed, load the results back to Moldex3D Studio. One can check the result and evaluate the design such as the core-out performance. Comparing with a run without push-back enabled (the orange line in the figure below), the Push-back process (started at 18 sec) clearly dominated the core-out result.