Authored by Jenny Wei, Engineer at Technical Support Team, Moldex3D
When manufacturing injection molded products, we can only see the final product and cannot directly observe the process during production. Knowing how the melt state changes will be more helpful in understanding the potential problems that may occur during injection molding. In Moldex3D Studio, users can specify the probe everywhere, and obtain the history curve from the probe to understand how the melt state changes during the injection molding process.
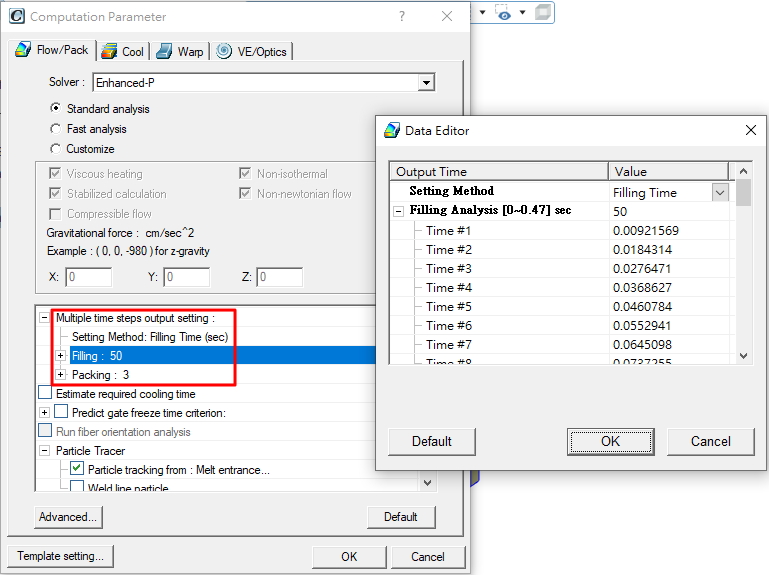
Step 1: Open a project and set the materials, process conditions, analysis sequence, and computing parameter. Then execute the analysis.
Note: Increase the number of multiple time steps output to make the history curve results more accurate.
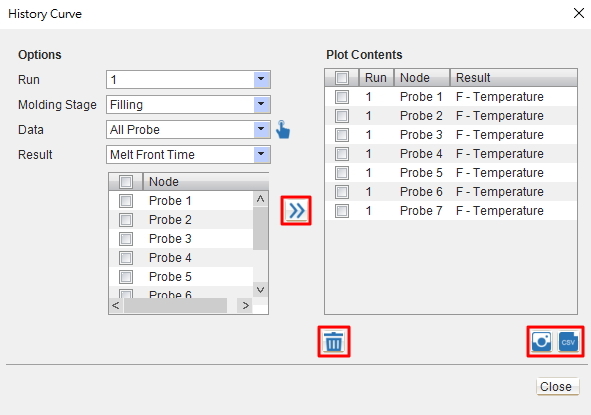
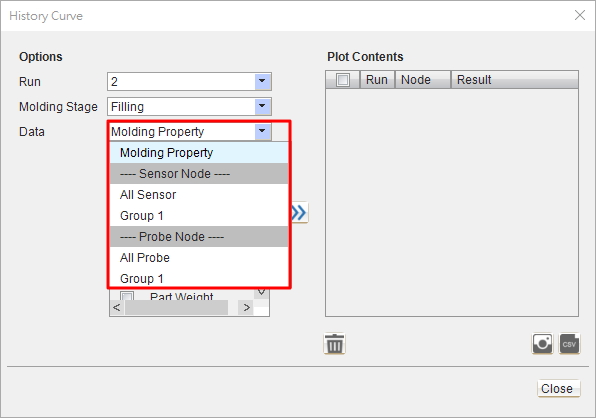
Step 2: Click the History curve  at the Results tab. Select the analysis group and molding stage to be observed in the pop-out wizard, and then select the data source from the data drop-down menu.
Note: In addition to the molding properties, users can choose the sensor nodes or probe nodes. The sensor nodes should be set before the analysis, and the Moldex3D Solver will record the data of the sensor nodes in the whole analysis process to provide the user with the observation. The probe nodes can be established at any time through  . The program will read the multiple time-step output data and draw the history curve for users to observe, so the accuracy of the probe node data depends on the multiple time-step output setting.
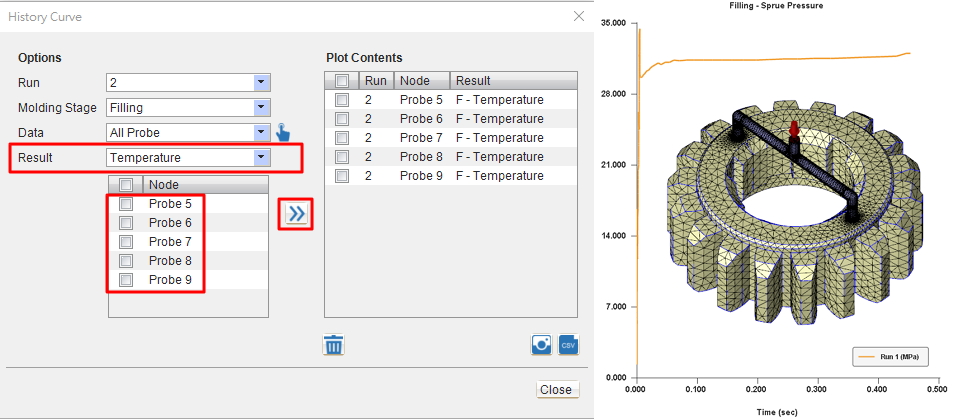
Step 3: Click the result drop-down menu and select the result and nodes to observe, and then click  to draw the history curve.
Step 4: Click on the top right of the plot to call the Setting Wizard. Users can customize the plot Tittle, X-axis/Y-axis, Legend and other settings in the different tabs.

Step 5: In the History Curve wizard, use  to clear the selected curve or click
  /
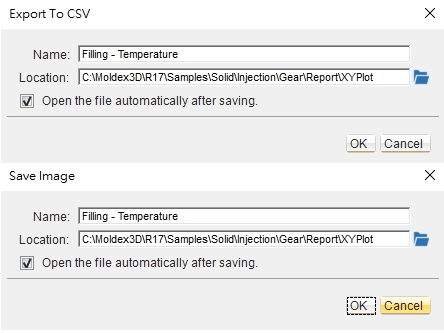
/  to export the plot image/CSV.
Note: check Open the file automatically after saving to open the file directly from the target path.