
Gate design in plastic molded products is done according to geometry, material properties, the molding cycle and other factors. Because of the variables in different sized gate designs, it is impossible to tell when the gate will freeze in the real filling process. Generally, the gate freeze time will vary depending on the molding parameter’s response to changing conditions on the real molding site. Thus, when calculating packing time, it is difficult to determine if the packing cycle needs to be extended. Consequently, insufficient packing causes the product’s cooling volume shrinkage to be too large. Furthermore, this will result in uneven shrinkage, warpage or surface defects such as sink marks. Using Moldex3D in the computation of parameters options will allow one to assess the results of the gate freeze time, allowing users to set the packing time as a reference. The function can enhance product quality while setting gate design, packing parameters and molding conditions correctly.
Step 1. Firstly, import a complete model (Figure 1), including the part and runner system.
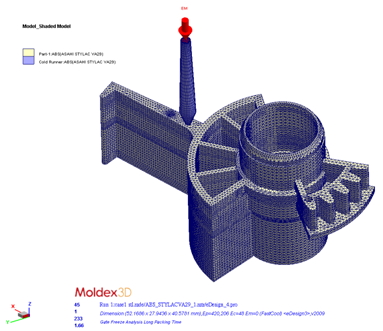
Fig. 1 Analytic Model
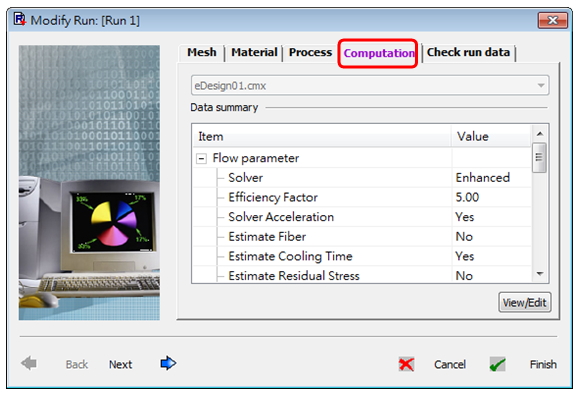
Step 2-1. After importing the model, define the materials and molding parameters, then enter the “computation” page.
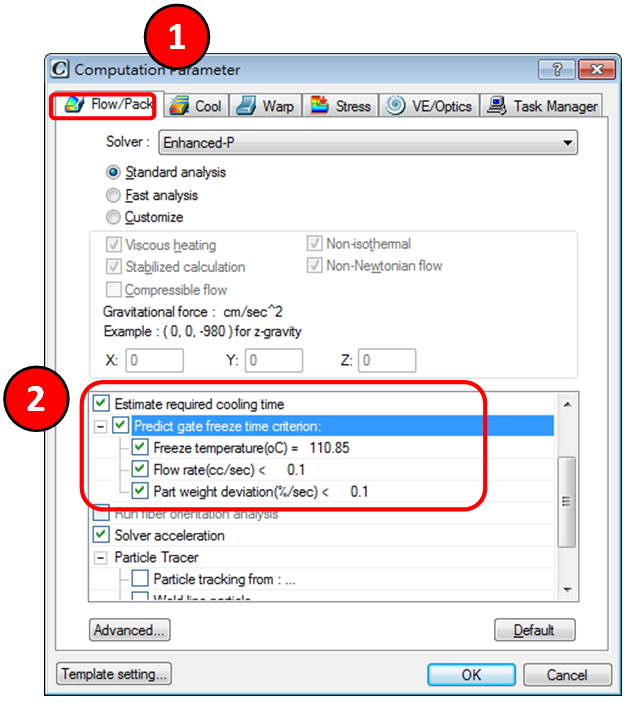
Step 2-2. In the computation parameters under the “Flow/Pack” project, first check the “predict gate freeze time criterion” option. Listed under the evaluation criteria in the analytic estimates, there are three conditions for users to choose. The conditions can be numerically displayed according to the user’s needs. The “freeze time (sec)” is defined as the point at which the gate section is lower than the set temperature (example set 110.85 oC); flow rate (cc/sec) is defined as the melt through the gate when the value is lower than the cross-section setting (example set to 0.1); plastic weight change rate (%/sec) is the weight alteration of the entire product below the settings (example set 0.1). Designers can select 1-3 options, if all three options are chosen; the gate freeze time will stop and the calculated values are subject to all three conditions.
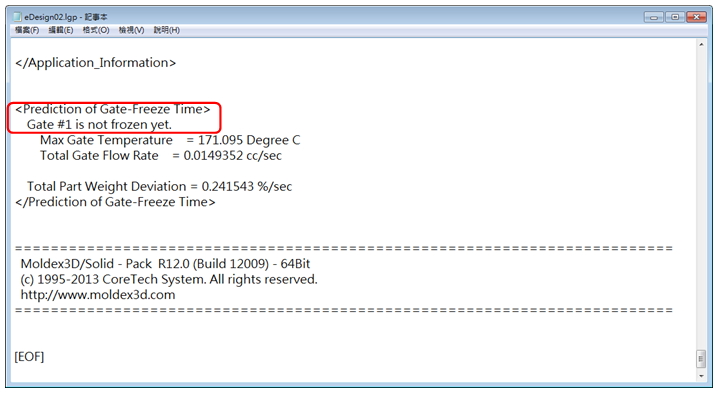
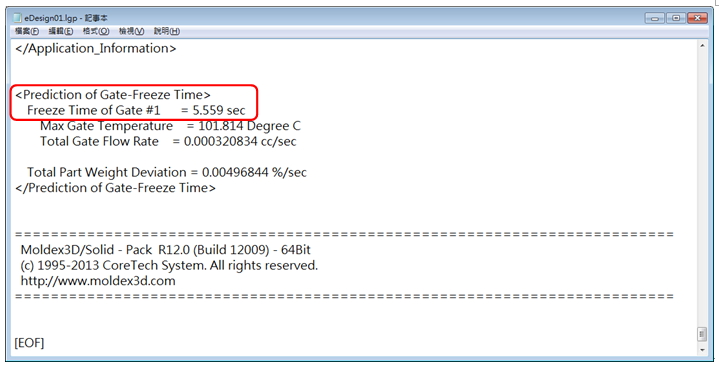
Step 3. After the analysis, open the packing analytic results, click “View log file”. ![]()

Step 4-1. If the packing time is too short, it will show this message “Gate is not frozen yet” in a red circle. Then, the designer will suggest extending the packing time.
Step 4-2. If the packing time is long enough, it will show the message “Freeze Time of Gate = predicted seconds” in a red circle. This case has an estimated time of 5.559 sec.
This function also supports multi-gates design. That is a feature in which the freeze time of each gate will be estimated individually.
Step 5. The case results comparison is shown here. All the molding conditions are the same. What is being compared is the magnitude of the deformed product with a packing time set to 3 seconds and 6 seconds. The analytic results indicate that the frozen gate with dimensional accuracy will be better than the unfrozen one.
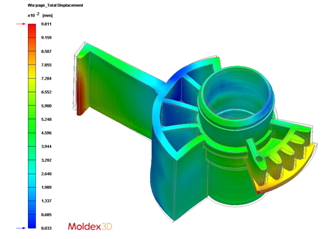 (a) The total displacement results of the gate that is not frozen, 0.033~9.811 (x10-2)mm (packing 3 sec)
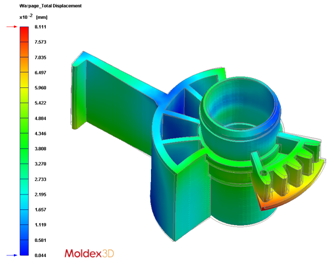 (b) The total displacement results of gate that is frozen, 0.044~8.111 (x10-2)mm (packing 6 sec)