 |
Debbie Weng, Manager at Technical Support Division, Moldex3D |
The mold compensation method is a common technique used to make reparations for injection molding part shrinkage. With a predicted deformation value, the mold cavity can be designed slightly larger than the real product to better meet the dimension criteria. However, due to the complexity of the molding process and its effect on part deformation, it is difficult to obtain the dimension change after molding and define a proper compensation value. To solve the issue, Moldex3D Studio enables users to Export Deformed Model with different formats of STL for further application. Also, combined with NX Global Deformation Format, the mold compensation method can be executed.
The following steps show how to export a deformed model and execute mold compensation.
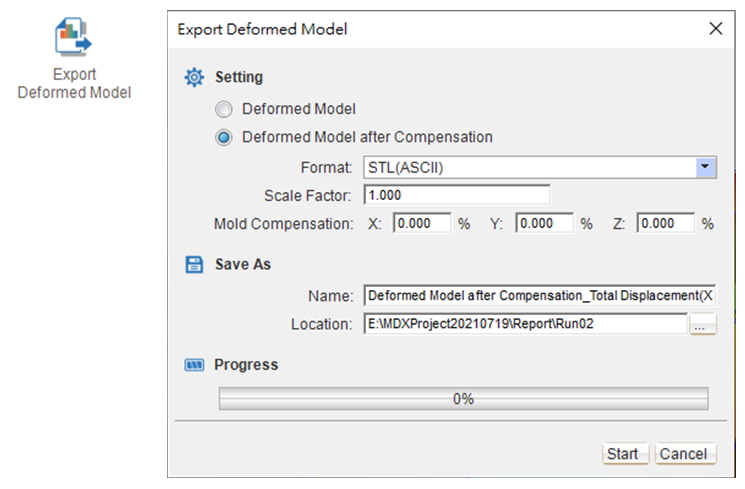
Step 1. After a Warpage analysis, go to Result Page and click Deformation and switch to the target tab, and then click Export Deformed Model after Compensation Option to export the warpage result. The available formats for export include the STL(ASCII), STL(Binary), CATIA RSO format and NX Global Deformation format.
Note: All the exported files are the surface mesh element data containing deformation information, and their associate CAD kernel are as follows. To obtain the deformed geometry profile, it requires a further transfer process which will be introduced in this article.
- The file *.stl will be exported with the file format setting STL(ASCII) and STL(Binary).
- The file *.rso will be exported with the file format setting CATIA RSO format.
- The files *.csv and *_Deformed.csv will be exported with the file format setting NX Global Deformation format.

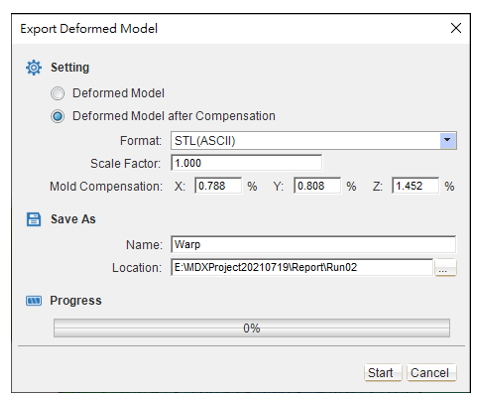
Before Step 1. Define the Warpage Scale with different compensation rates of the deformation in the XYZ directions. Use the Distance on the Measurement to check the linear shrinkage of the XYZ directions. Then, follow the shrinkage percentage to compensate the model. In the demo model as shown below, the X-direction linear shrinkage is 0.389%, the Y-direction is 0.404%, and the Z-direction is 0.726%.

Step 2. To use the Export Deformed Model feature, select the Deformed Model after Compensation with the format as the NX Global Deformation format and specify the Scale Factor as “1”. Also enter the Mold compensation value in the XYZ directions that is Twice as large of their linear shrinkage percentage obtained previously. Then, specify the file name and folder path, and click Start to export the file.
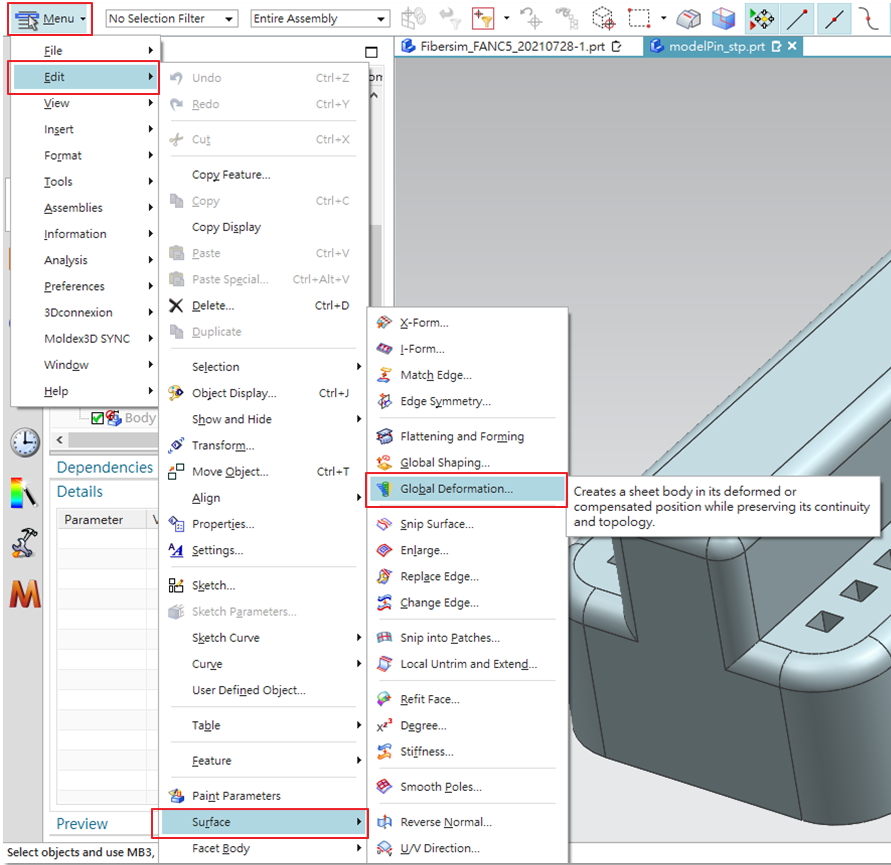
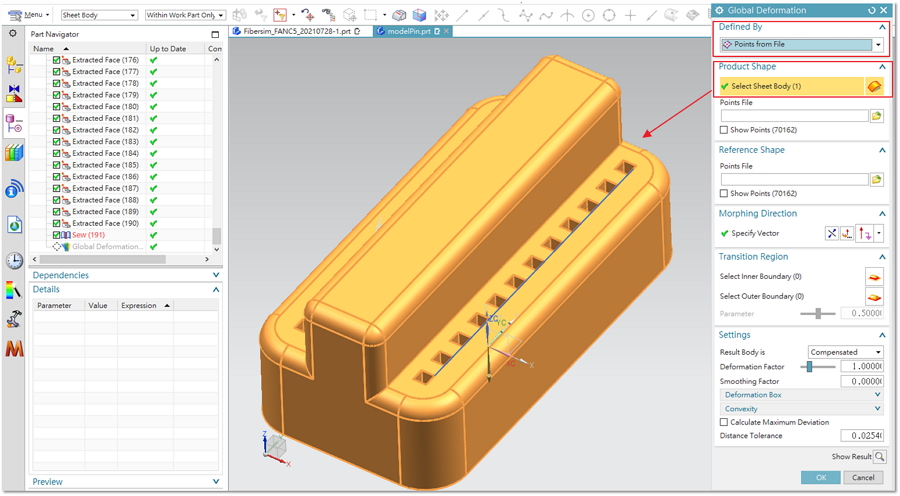
Step 3. In the NX user interface, open the original model first, and launch Global Deformation with the steps: Menu → Edit → Surface → Global Deformation. Choose the Points from file and click the Select Sheet Body to choose the original model, which will be shown in orange.
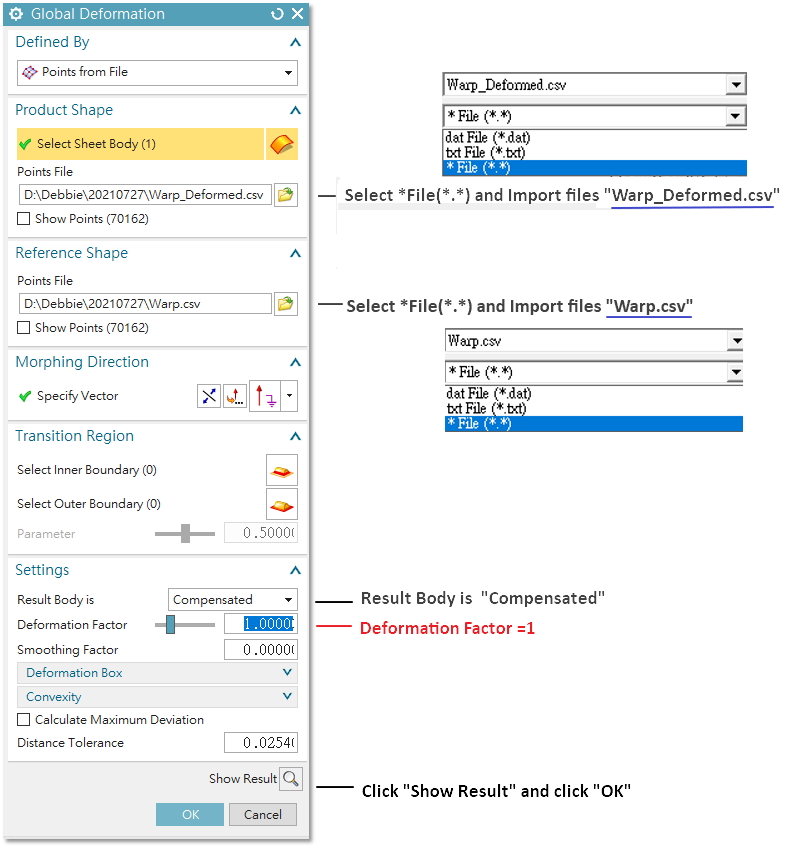
Step 4. Import and select the Points file type “*.File(*.*)” and import the files *Warp.csv and *Warp_Deformed.csv. Set the result body as Compensated and define the deformation factor as 1.00. Then click Show Results and OK.
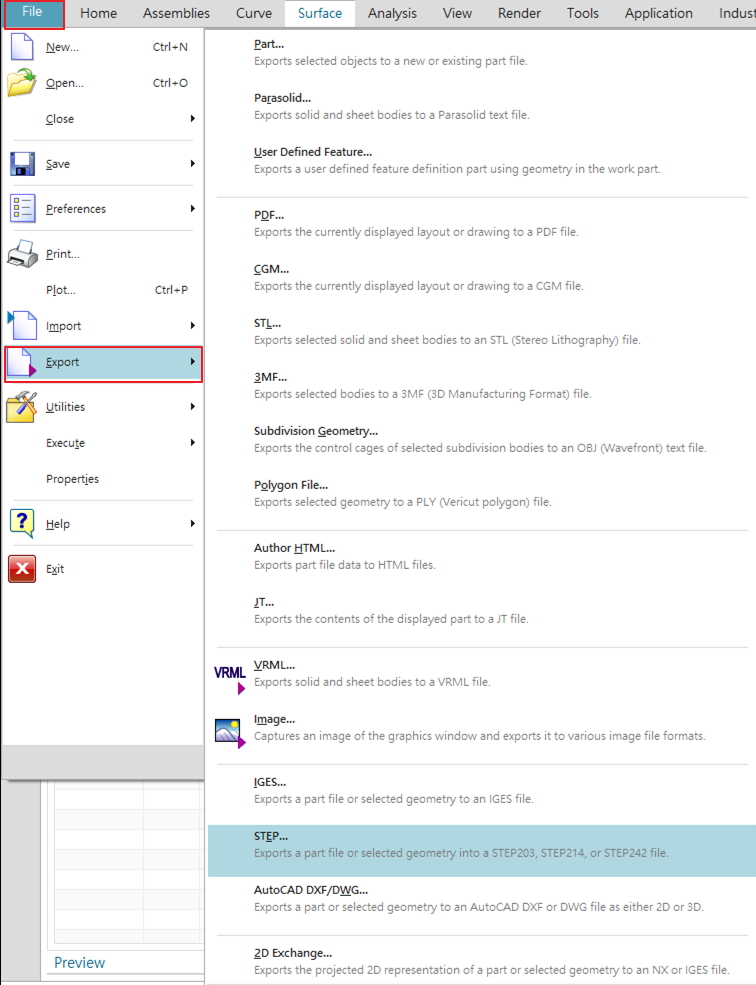
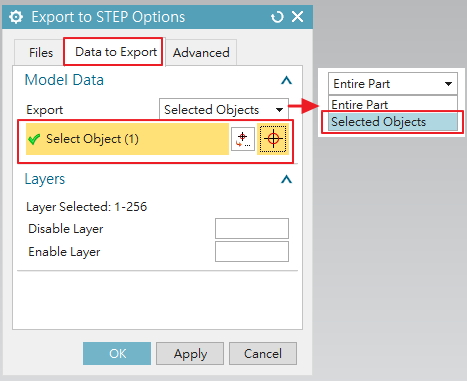
Step 5. To Export the deformed model, follow the steps : File → Export → STEP (based on file type required). Use Selected Objects in Date to Export, and then click model list of Sheet Body of Global Deformation and OK to export
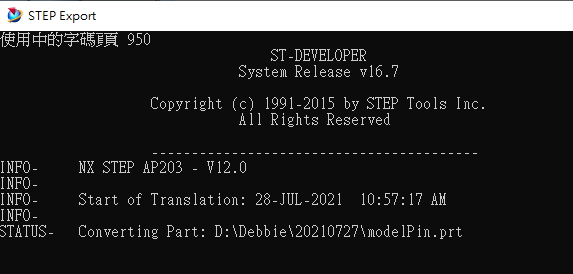
Step 6. Process CAD converting and export the compensation model.