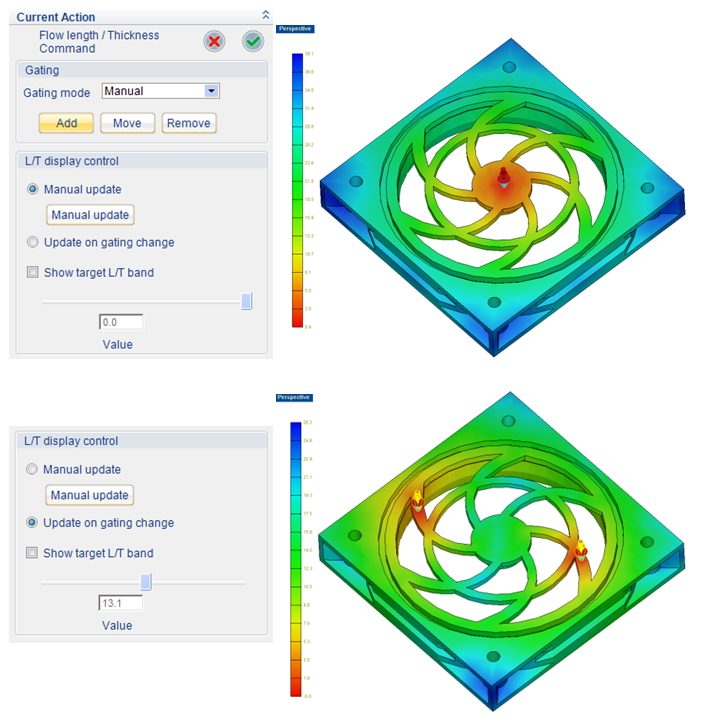
Gate Location Advisor is a useful tool for users to choose the location(s) of the gate(s). In Step 2, in the pre-processing procedure, click Gate Location Advisor and call the workspace with two sections of settings, Gating and L/T display control. The workflow of this function is to first add gate(s) on the cavity and then, based on the existing gate(s), examine the L/T distribution. Normally the L/T distribution should be minimized and as even as possible for different gates. In addition, there is an additional L/T display with more advanced functions for experienced users.
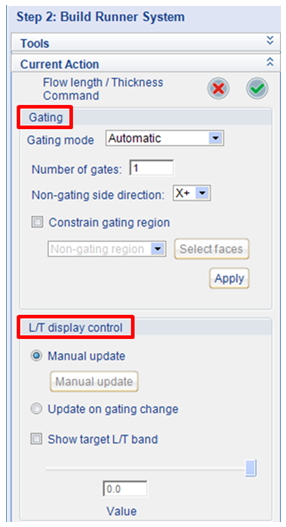
Step 1. Click Gate Location Advisor to launch workspace and specify. There are two gating modes available: Automatic and Manual.
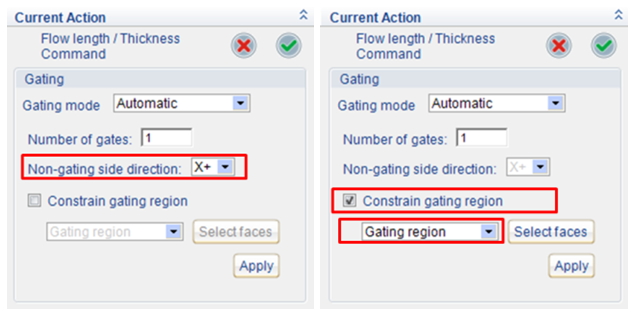
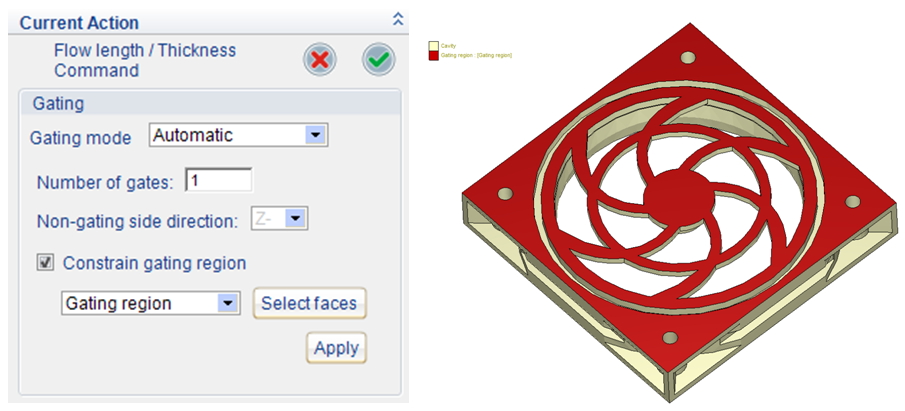
Step 2. For automatic mode, simply specify the number of gates and select either Non-gating side direction or Constrain gating region.
Note: The two icons cannot be selected together.
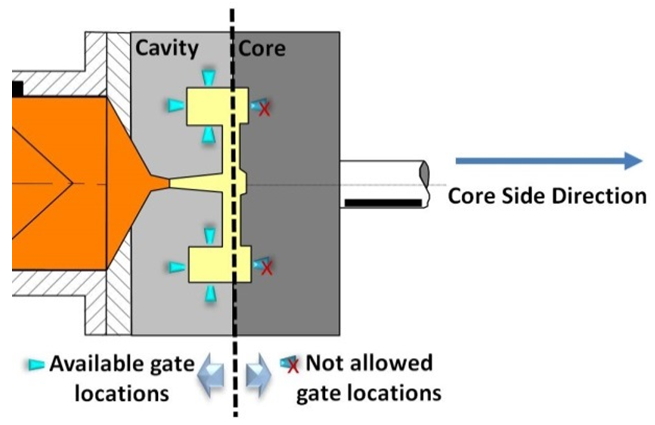
Note: The Non-gating side refers to the core side direction where gate placement should be avoided.
Step 3. For the following geometry, Gate Location Advisor function by both Non-gating side direction and Constrain gating region approach will be illustrated.
When Non-gating side direction is selected (-Z in this case), the gate is rationally being placed on the +Z direction by the gate location advisor.

Alternatively, one can also use the gate location advisor to help identify where the most appropriate gate location with a specific gating direction or non-gating region setting, and select faces where one wants to place or constrain the gate(s).
Step 4. After the settings are done, click Apply to calculate the best gate location and automatically add the gates(s) accordingly.
Note: The calculation is based on flow length-to-thickness ratio. For Manual mode, click Add to add gate(s) on the cavity.
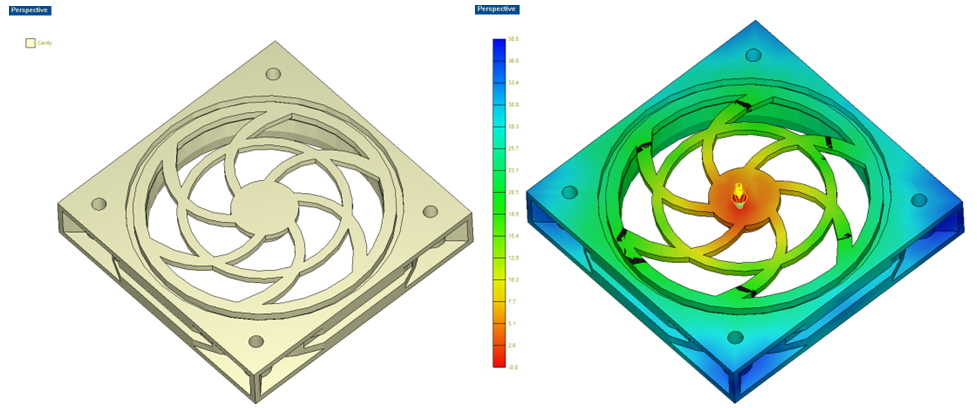
Step 5. Use L/T display control tool to check the result. L/T display control will show the L/T distribution based on the existing gates added on the cavity. You can select either Manual update or Update on gating change as the updating method.