
Fred Yang, Engineer at the Product R&D Division of CoreTech System (Moldex3D)
The Resin Transfer Molding (RTM) process is used in the manufacturing of polymer reinforced composite products and widely applied in the aerospace, wind power, automotive and sports industries. The RTM process includes prepreg draping, filling, heating/curing, and demolding. In order to control the molding issues during the whole process, the industry will utilize the mold filling simulation software integrating with the structural analysis software to predict the producibility and modify before actual manufacturing. During the simulation, the more accurate the imported data is, the more consistent the analysis results will be with the actual molding.
While creating an RTM project in Moldex3D, users have to generate solid mesh through the RTM Wizard in Moldex3D Mesh. The new version, Moldex3D R17, has optimized the workflow of mesh generation and orientation settings by omitting or integrating many steps in the mesh generation process. With this optimization, users will no longer have to repeat the same steps when generating the mesh of multiple RTM layers. Moreover, this version also supports users to set the group amount and different thickness at the setting stage to generate multiple-layer solid mesh, and distinguish different layer groups.
In the draping process, the bending fabric extension will cause the fiber orientation and material property changes, and further affect the resin flow behaviors. With the fabric orientation setting feature in the RTM Wizard, users can import the draping analysis results from LS-DYNA so that the orientation results will be mapped to the solid mesh. Thus, the orientation settings at the corners will be more consistent with the real fabric orientation in the draping process.
To speed up curing in the RTM process, the mold temperature will be increased at the curing stage for faster resin reaction. Moldex3D provides the curing temperature profile, simplifying the temperature setting of the curing stage. Users can generate multiple layers of solid mesh in one time (Fig. 1) and map the LS-DYNA orientation results (Fig. 2) by setting the layer groups and thickness. Finally, the pre-processed mesh is input into Moldex3D Studio for subsequent analysis (Fig. 3). Fig. 4 shows the simulation results through the mold temperature profile for the curing process.
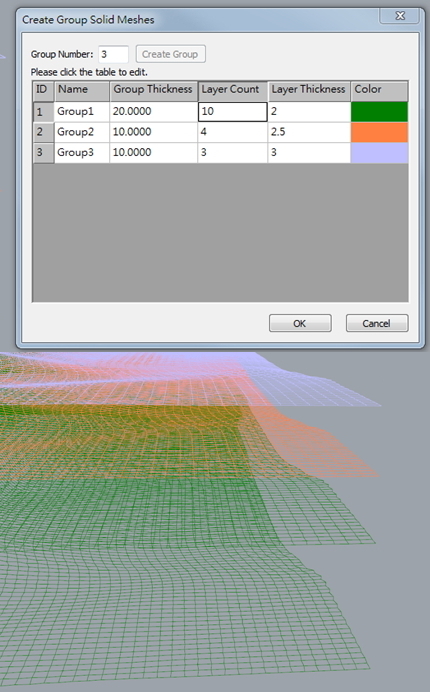
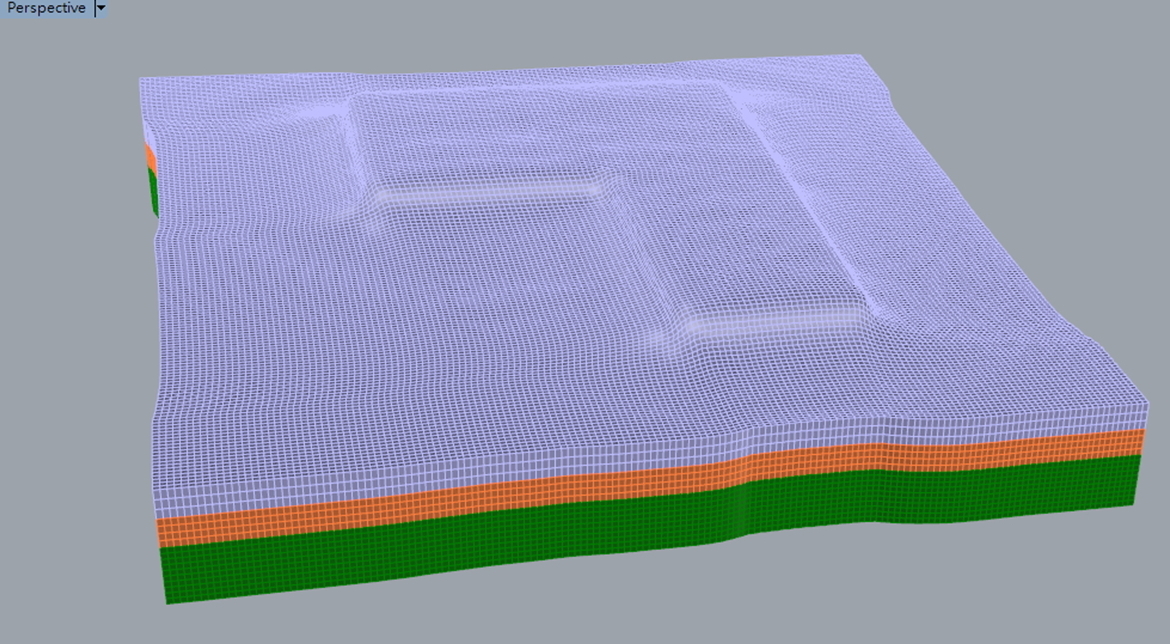
Fig. 1 RTM Wizard can generate multiple-layer solid mesh at the same time
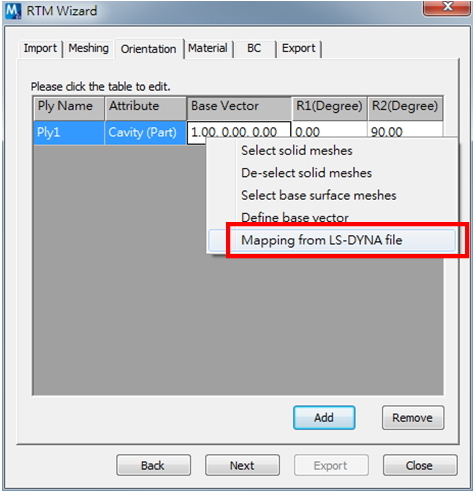
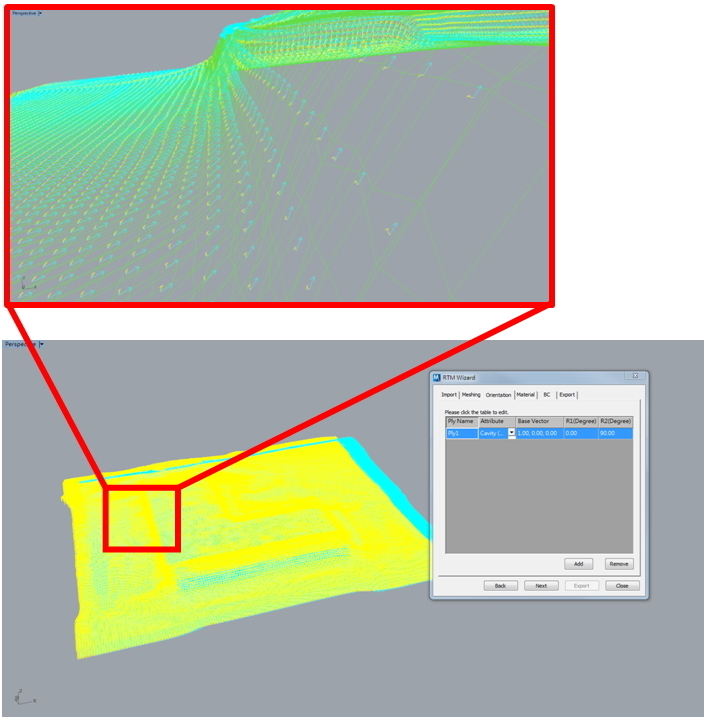
Fig. 2 The LS-DYNA orientation results can be mapped through the RTM Wizard

Fig. 3 Import mesh files into Moldex3D Studio for analysis
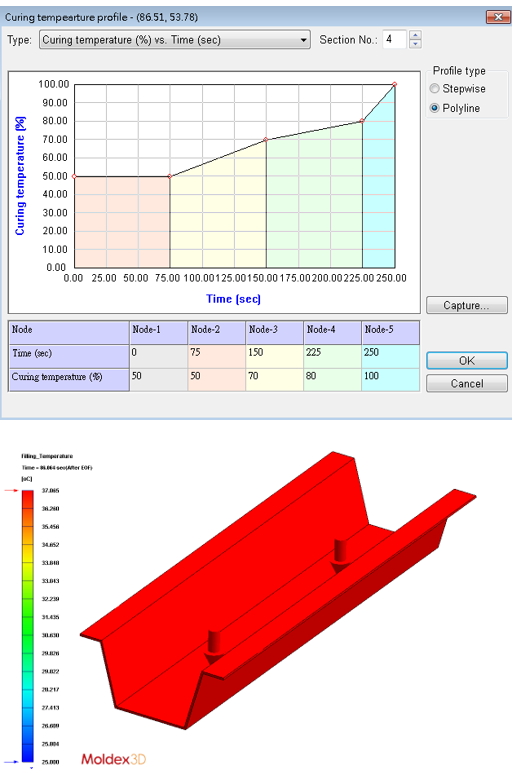
Fig. 4 The mold temperature profile for the curing process
Because of the complicated layered structure in the RTM process, it will cost lots of time on the pre-processing in the simulation project. To overcome the difficulties, Moldex3D has developed new features to optimize the workflow, reducing many unnecessary setting steps. Thus, users can be more focused on the simulation result discussion and resolving manufacturing issues.