
Moldex3D provides Report Wizard in the post processing to generate reports automatically. After the analysis is done, the Report wizard icon will show up in the menu bar. Then users can generate a report with a standard template by following the steps: Report → Preferences → Save As → Start.
In addition to the standard template, Moldex3D also allows users to make their customized template in the Report Wizard. In the customized template, users can modify the analysis results location, report styles, layout and designs according to their needs.
Moldex3D Report Wizard recognizes the images, text, graphs, and values from the results through the Tag Lookup method. Users can create their customized template in the Report Wizard by following the steps below.
Step 1: Go to the installation directory folder (C:\Moldex3D\R17\Template), and open Studio_Report Tag LookUp Table.xlsx and Studio_General_Template.pptx. The excel file lists all availabilities of image, video, graph, and value for each function and the corresponding tags, and the PPT is the original template built up using these tags.
Step 2: Create your own tag for the customized template (Refer to Fig. 1). Table 1 is an example of Filling Pressure tag lookup.
Note: (!CHECK) means to remove the whole slide if no data is found. Check the Tag Lookup and the usage of strings in the original template as a reference.
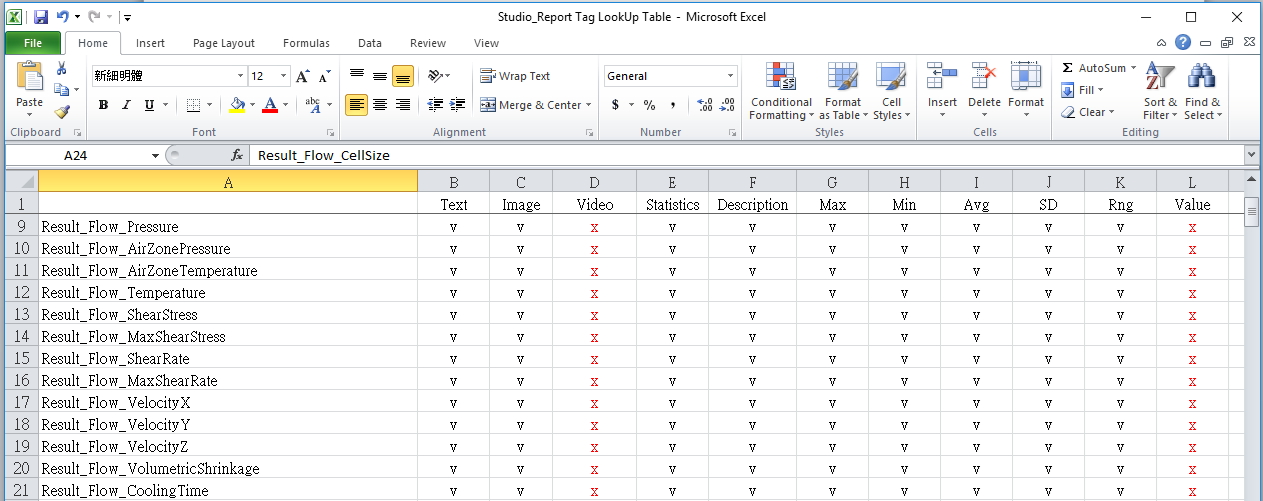
Fig. 1 Tag Lookup Table
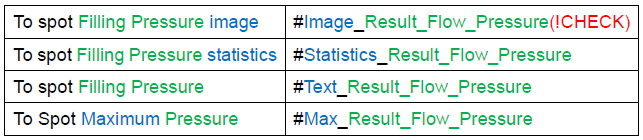
Table 1 Filling Result Tags
Step 3: Develop your own template as per the requirements like different result placing locations, font size, image size, page design, etc.
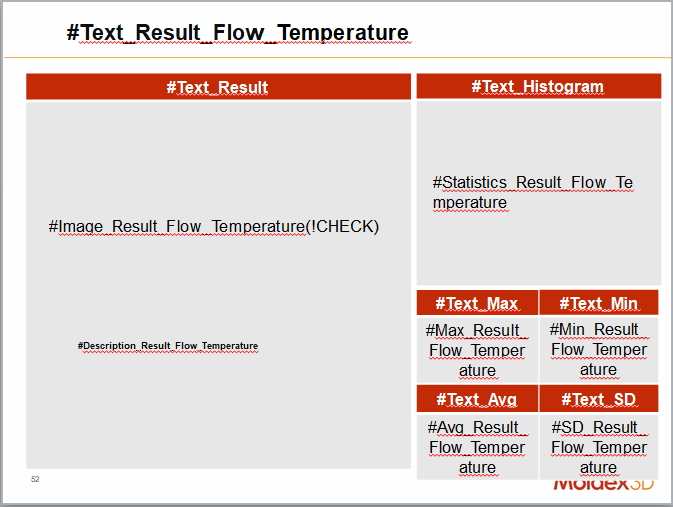
For example: In the standard template report, the filling pressure and temperature tag lookup string are shown in different pages (Fig. 2 (a), (b); also refer to table 1). In the customized template, the filling pressure and temperature tag lookup string can be put into one page with different page design, font, etc (Fig. 2 (c)).
Note: Save your own customized template in the same folder.
| (a) | (b) | (c) | ||
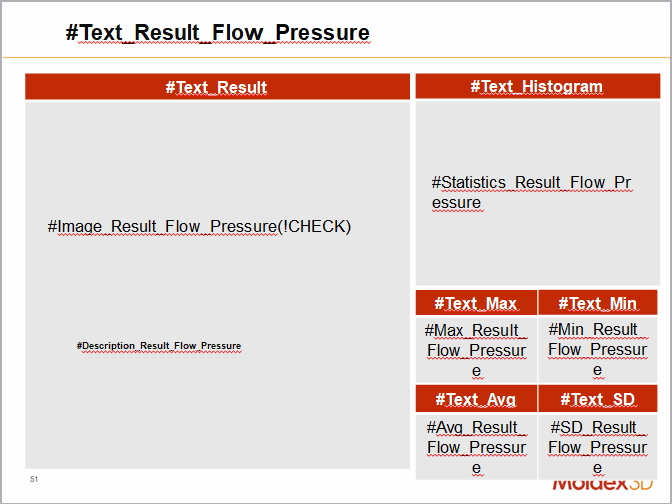 |
 |
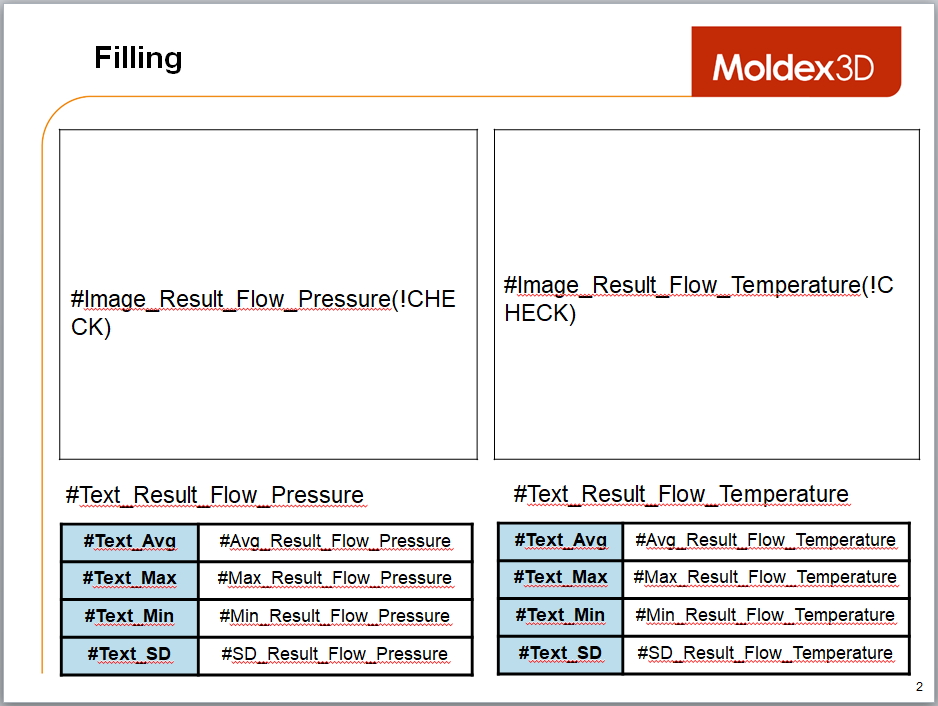 |
Fig. 2 (a)(b) Standard Template; (c) Customized template as per the needs.
Step 4: In Studio, click Report to launch Report Wizard and choose Template as the customized template. Specify other report preferences and click Start to generate the report. Users can open the report by clicking Play or find it in the specified location.
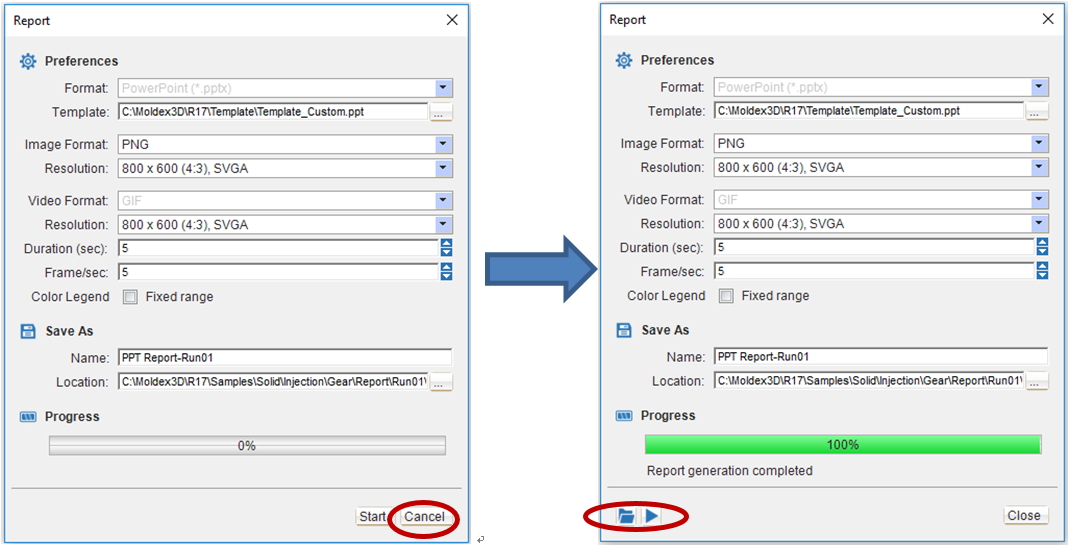
Fig. 3 Report Wizard
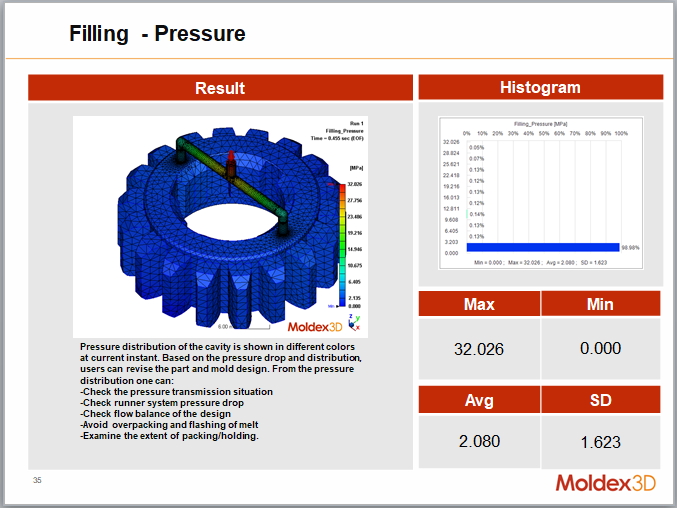
Step 5: Fig. 4(a) and (b) shows the standard template results (refer to Fig. 2 (a), (b)). Fig. 4(c) shows the customized template results as per the user’s needs (refer to Fig. 2 (c)).
| (a) | (b) | (c) | ||
 |
 |
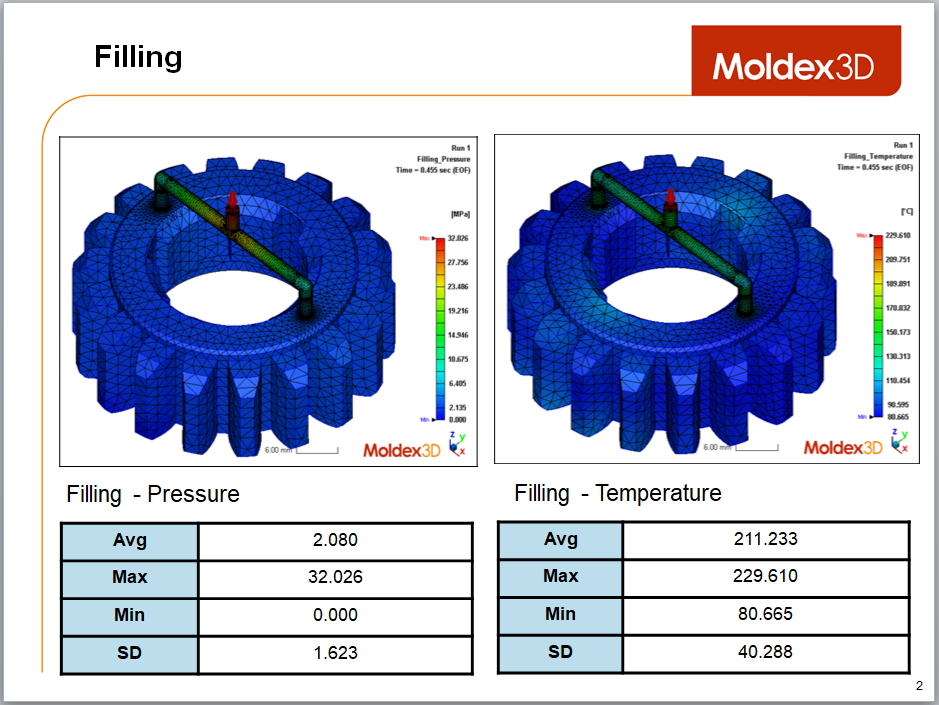 |
Fig. 4 (a)(b) Standard Template; (c) Customized template as per the needs