Technical Validation Department.Pierre Yeh
Standard templates allow Moldex3D Studio users to quickly set up simulation runs. This is particularly beneficial when handling projects requiring repetitive parameter setup. Users can configure standard templates in advance and apply them when creating a new project—saving time on manual work, preventing human error, and improving both team collaboration and automated workflow stability.
Standard templates in Moldex3D Studio fall into three categories: process templates, computation templates, and verification templates. Process templates are used to save frequently used process settings, such as filling/packing and cooling conditions. For example, to evaluate simulation results across different materials under identical processing conditions, users can configure a process template and apply it directly without re-setting parameters such as melt temperature, mold temperature, filling time, and packing time each time.
Computation templates allow users to create multiple configuration sets. Saved items are displayed clearly and are easy to manage. For instance, if a team uses a standard set of parameters for warpage analysis, these parameters can be saved as a computation template. This ensures consistency across team members and eliminates discrepancies when comparing results.
Additionally, standard templates streamline automated workflows. When batch-creating simulation runs, using standard templates eliminates the need to repeatedly set parameters in the script. Once the standard process conditions are modified, users only need to update the template. This improves script readability and maintainability.
Standard Template Setup
Step 1: Save Parameters as a Template
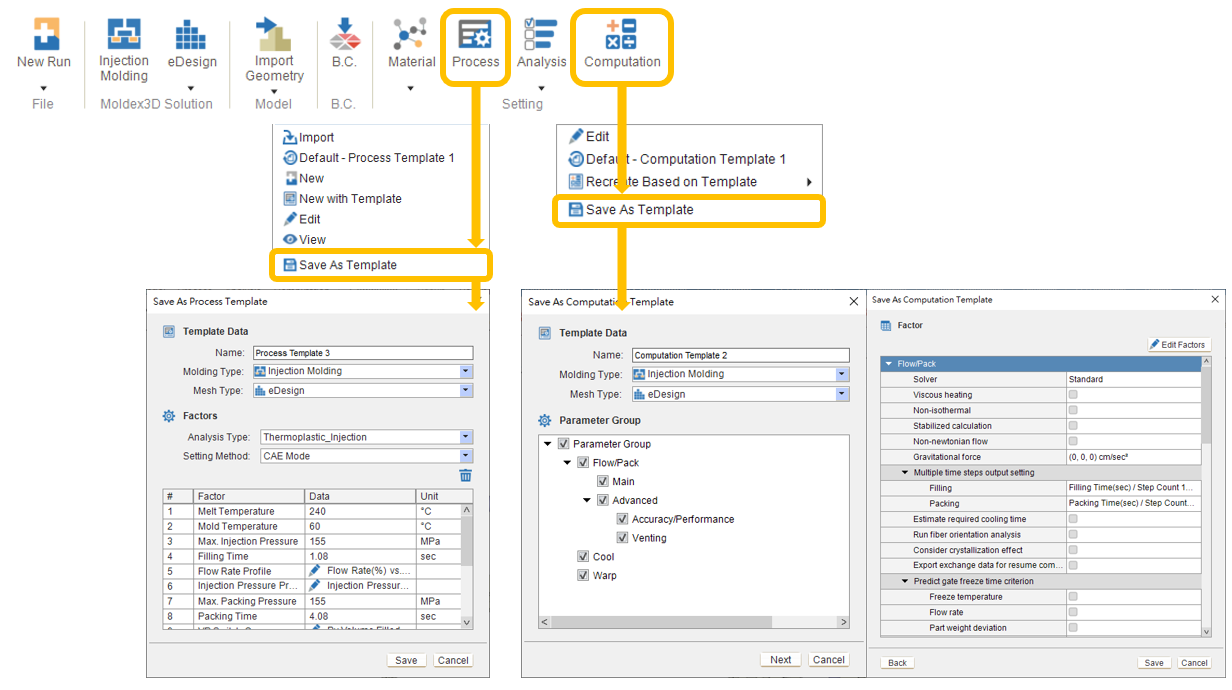
Click Process or Computation, and then select Save as Template to save existing process conditions or computation parameter settings as a template.
Step 2: Set the Template as the Default Item
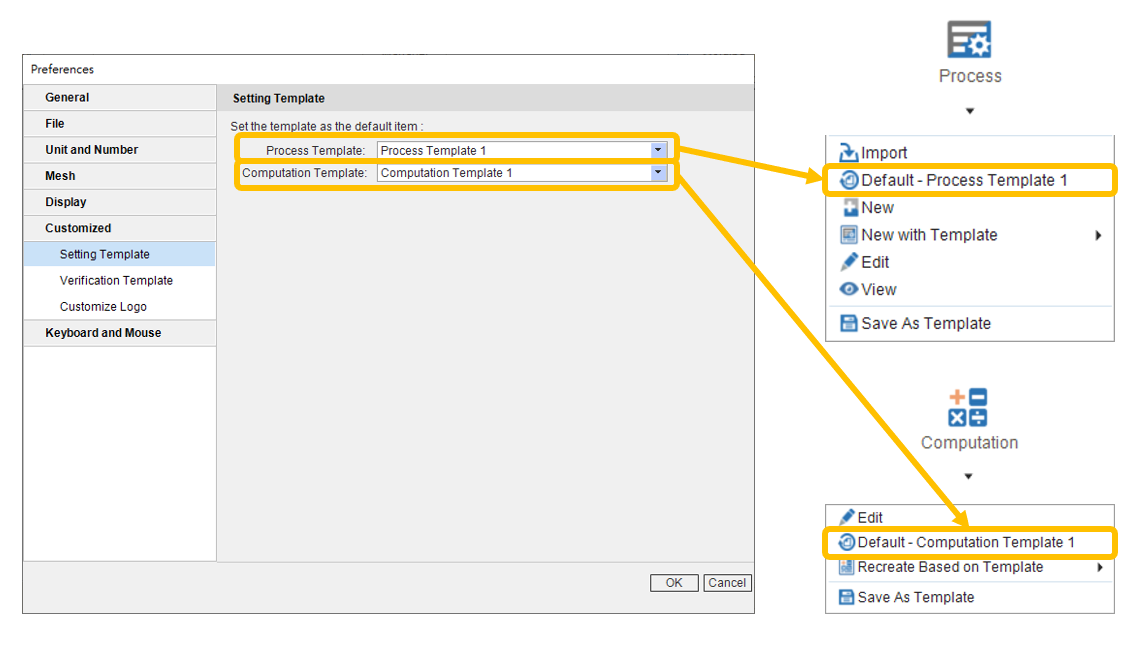
Open the Customized tab in Preferences. Under Setting Template, users can set the configured process template and computation template as the default items.
Process Template Setup
Step 1: Add a Template
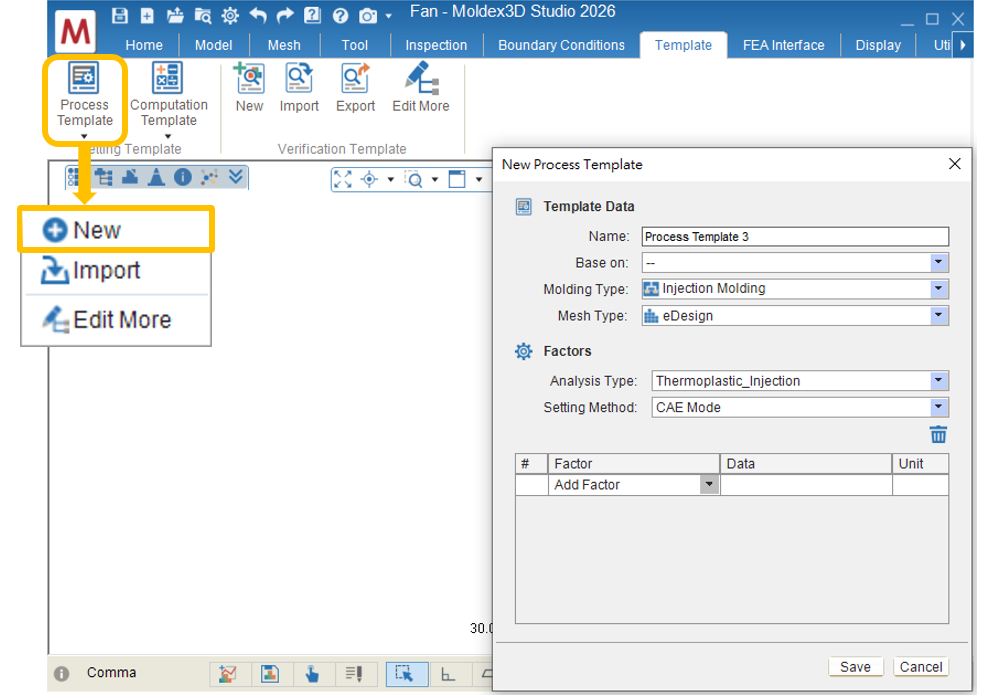
Open a project and switch to the Template tab. In the Process Template drop-down menu, click New.
Step 2: Edit Factors
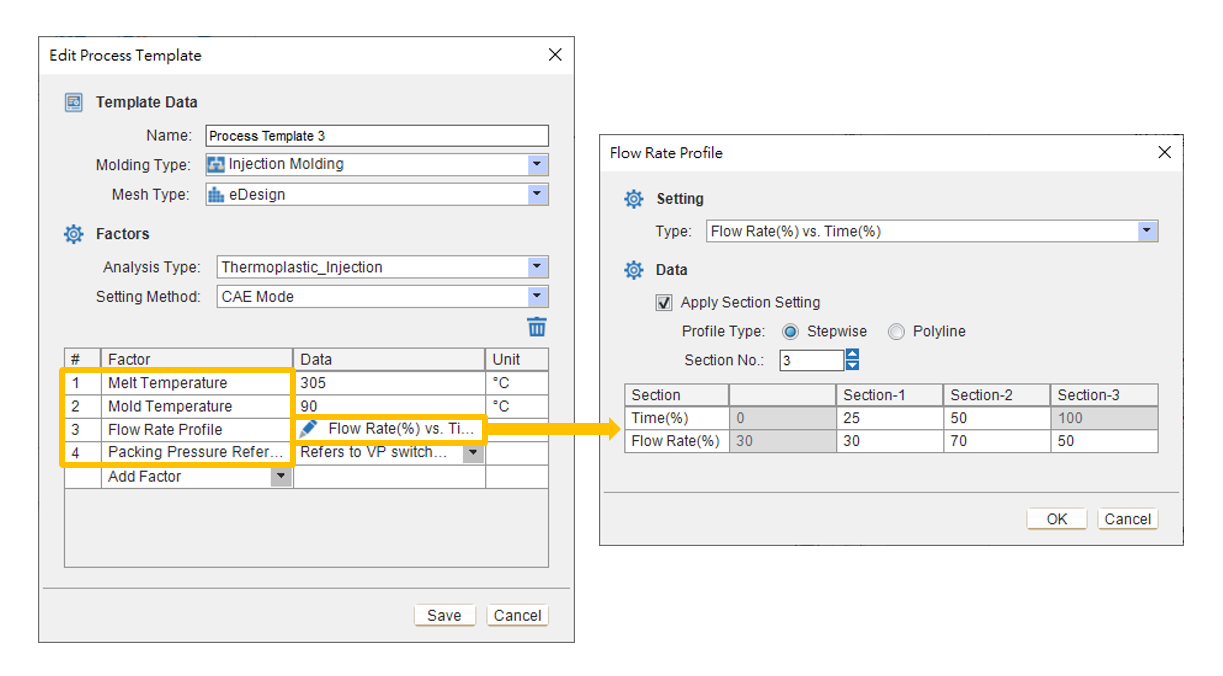
Add required factors and enter their corresponding values or options. The profile setting window opens when a profile needs adjustment.
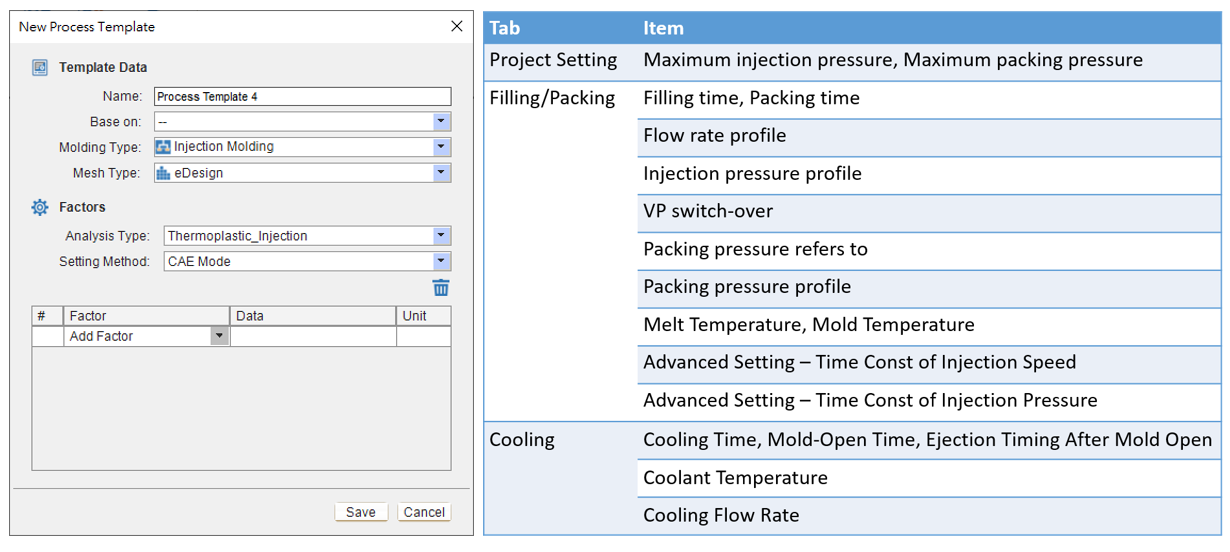
The factors supported by the process template are listed below:
Step 3: Apply the Template
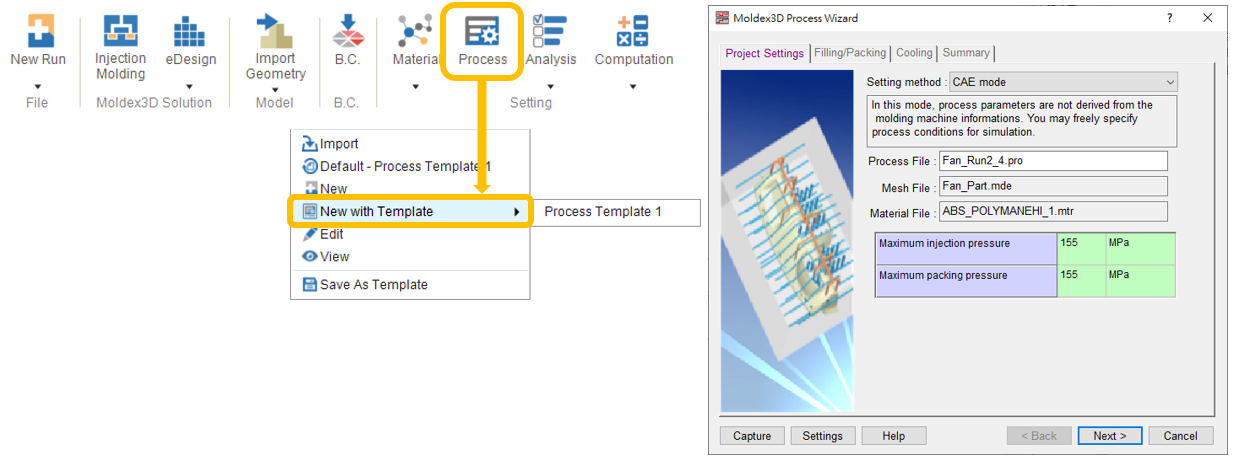
In the Process drop-down menu, click New with Template and select a template. The Process Wizard window is displayed. Review the configured process parameters and click Finish to apply the template.
Computation Template Setup
Step 1: Add a Template
Open a project and switch to the Template tab. In the Computation Template drop-down menu, click New.
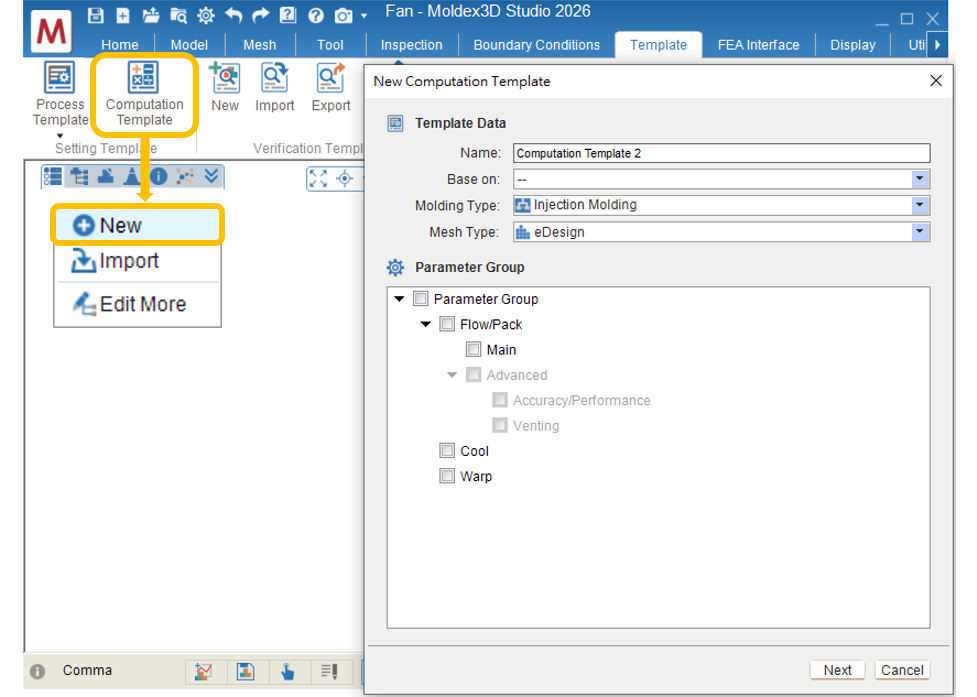
The factors supported by the computation template are listed below:
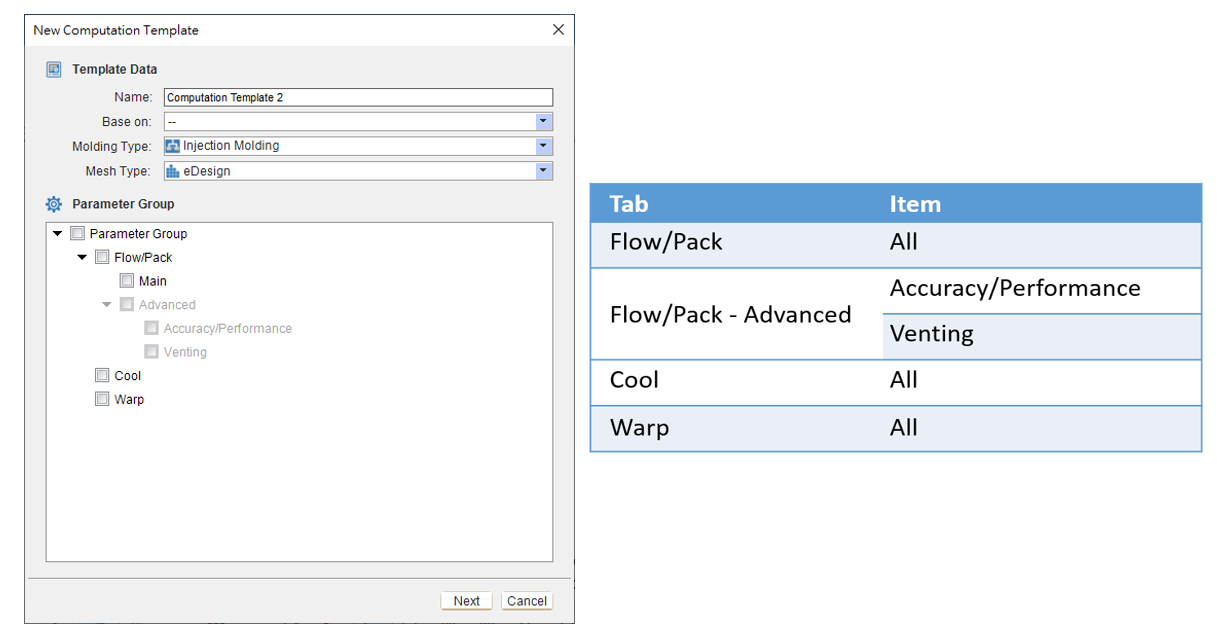
Step 2: Edit Factors
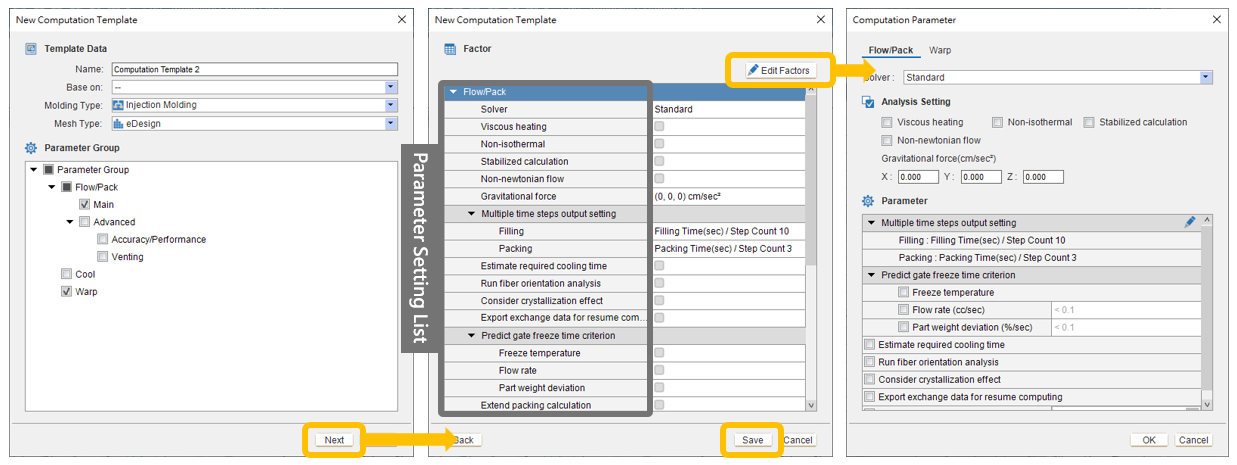
Select Parameter Group and click Next. A parameter setting list is then displayed. Click Edit Factors to configure the parameters. Once finished, click Save.
Step 3: Apply the Template
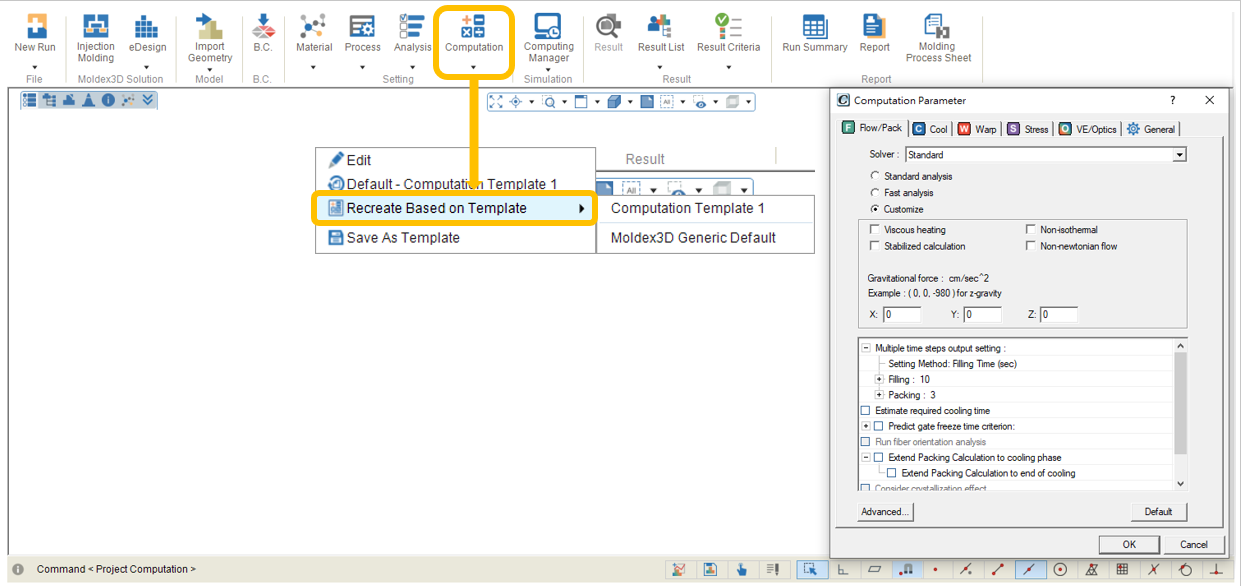
In the Computation drop-down menu, click Recreate Based on Template and select a template. The program then resets computation parameters based on the selected template.