Jill Chen, Administrator at Product R&D Division of CoreTech System (Moldex3D)
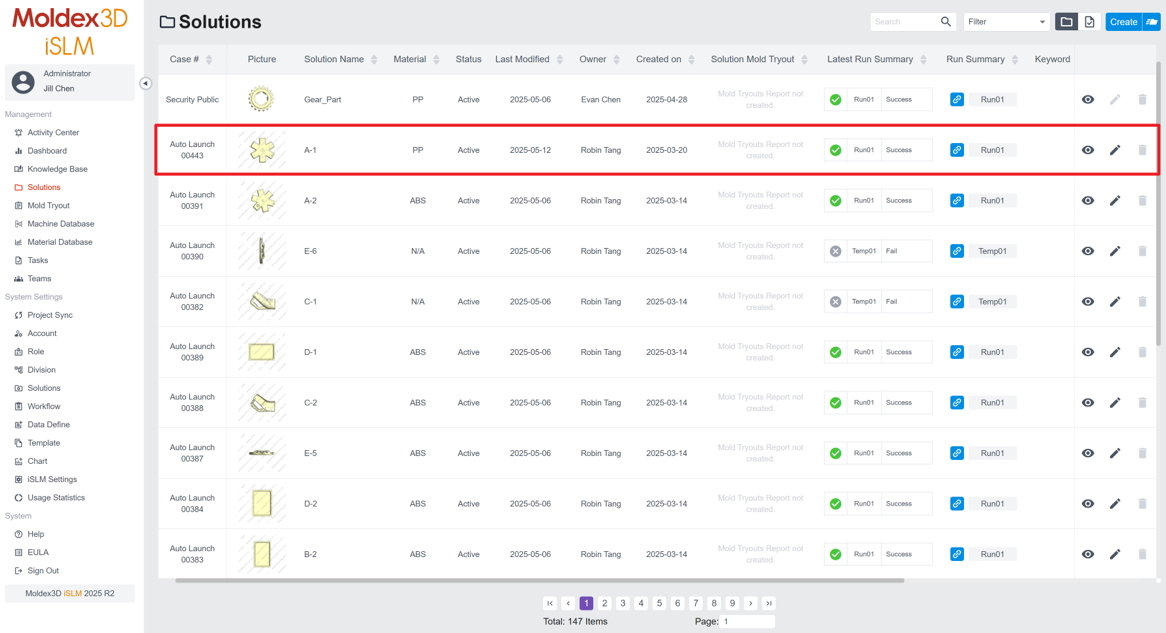
Moldex3D iSLM’s project management provides users with a complete, systematic framework that thoroughly records the entire injection molding development process and organizes it by individual project. To enhance the efficiency and convenience of project creation, iSLM officially introduces the Auto Launch function in 2025. In addition to the existing manual project-creation method, users can now simply upload a CAD model and use the new function to automatically create a project.
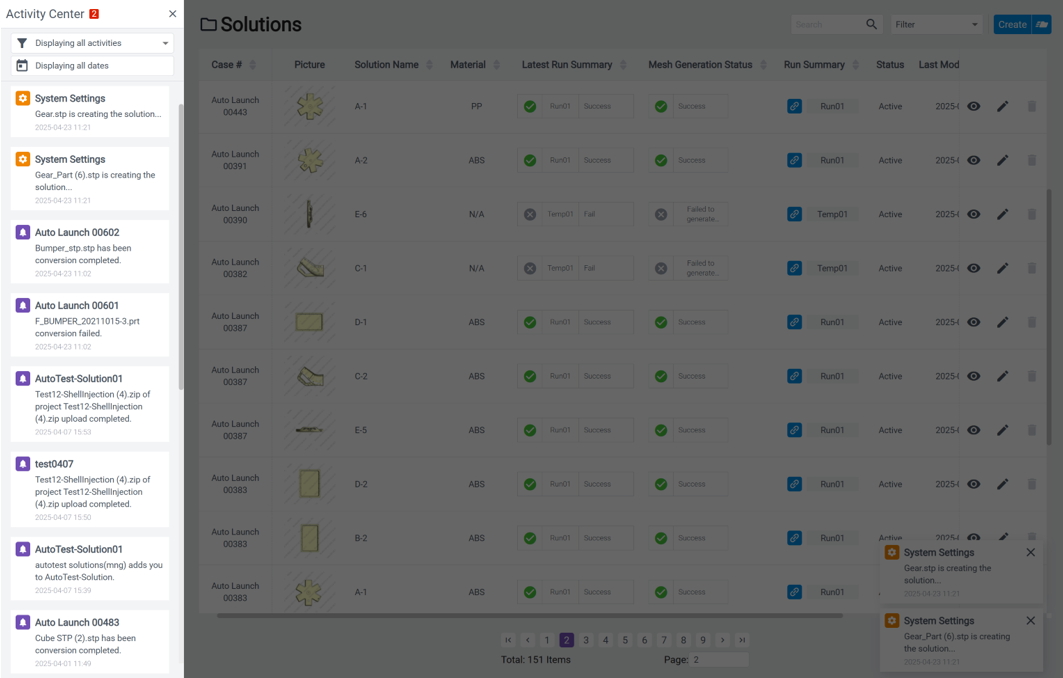
By integrating Gate Design Discovery, the system can automatically determine optimal gate locations during analysis, set up spot gating, and generate preliminary analysis results—delivering precise reference data for subsequent development. This significantly shortens the development cycle, improves productivity, and greatly reduces the time and labor required for manual operations. Once Auto Launch is activated, the system displays execution status in real time so that users can monitor progress at any moment; related messages are also synchronized to the Activity Center, where users can click to view all notification details.
The following outlines the steps and tips for automatic project creation using Auto Launch.
Step-by-step Procedure
Pre-requisites
- On the iSLM settings page, the RC Server Information is configured and enabled.
- At least one item on the Analysis Process page is enabled.
- At least one item in the material database is enabled.
- The user has read, edit, and delete permissions for the project.
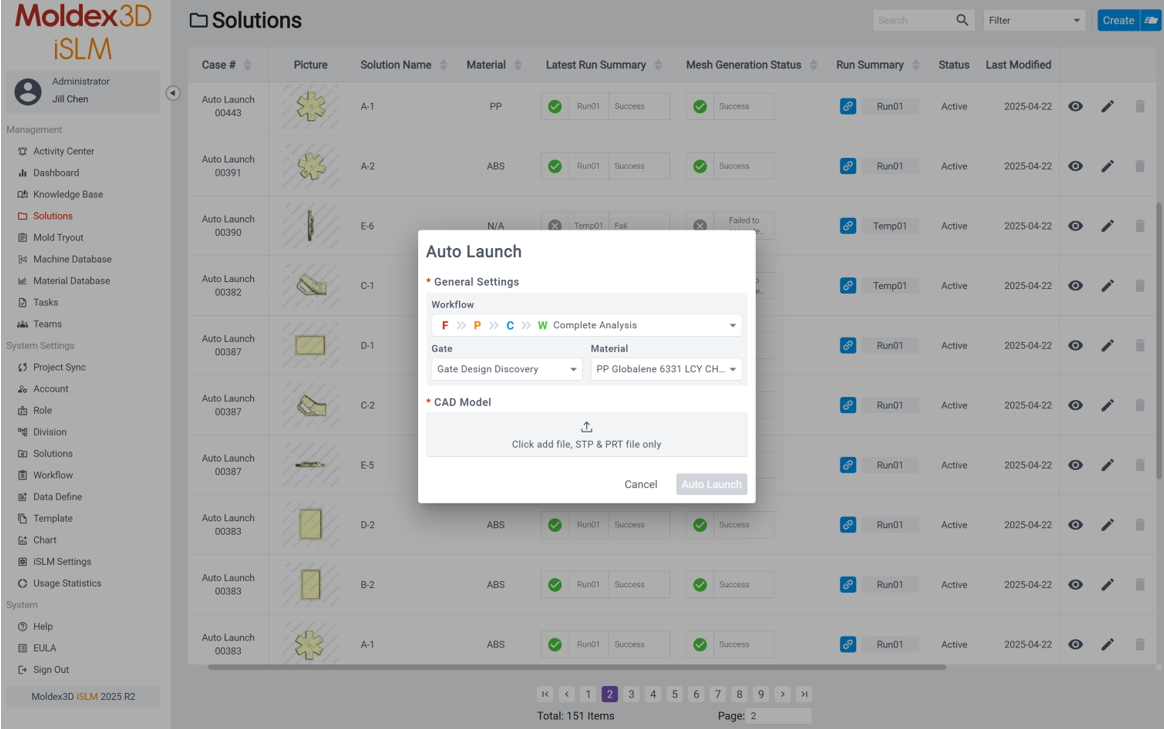
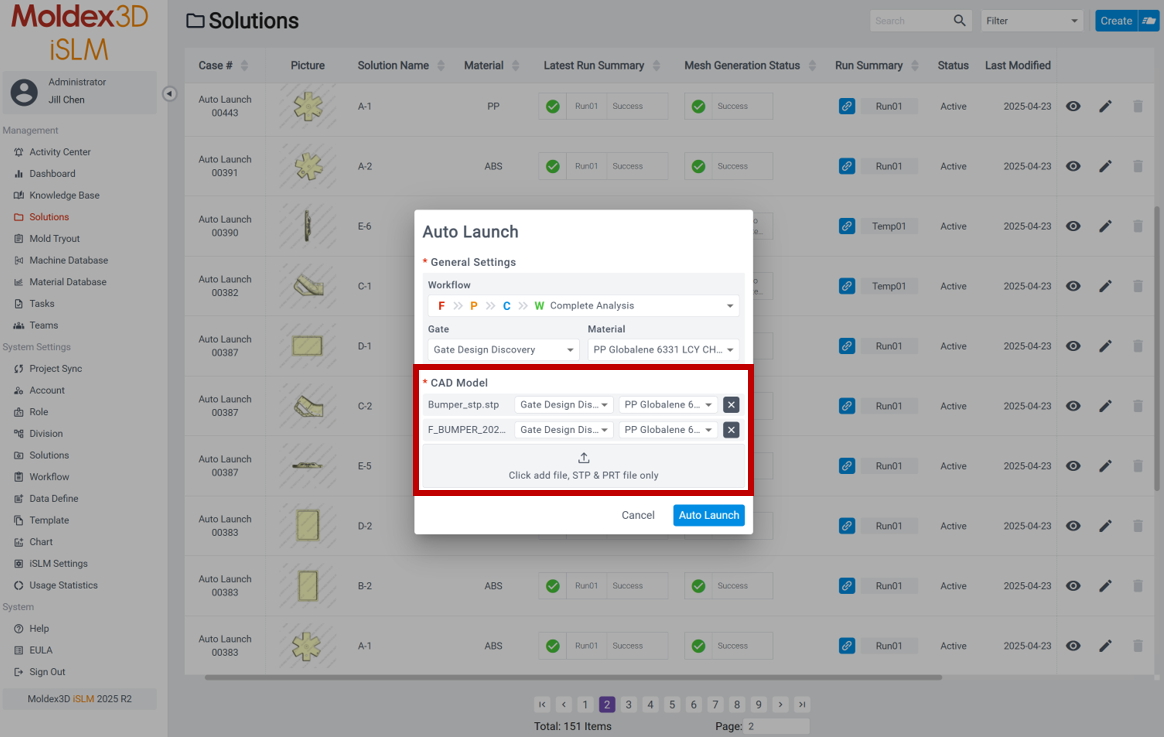
Step 1-1: General Settings
On the project page, click Auto Launch to open the settings window. In the Workflow menu, set the analysis process. All analysis items can be configured within the settings window, and subsequent project analyses will follow these settings. In the Gate menu, select the gate creation method: Manually or Gate Design Discovery. Next, select the material in the Material menu. All the material files are available in the material database.
Step 1-2: Gate Settings
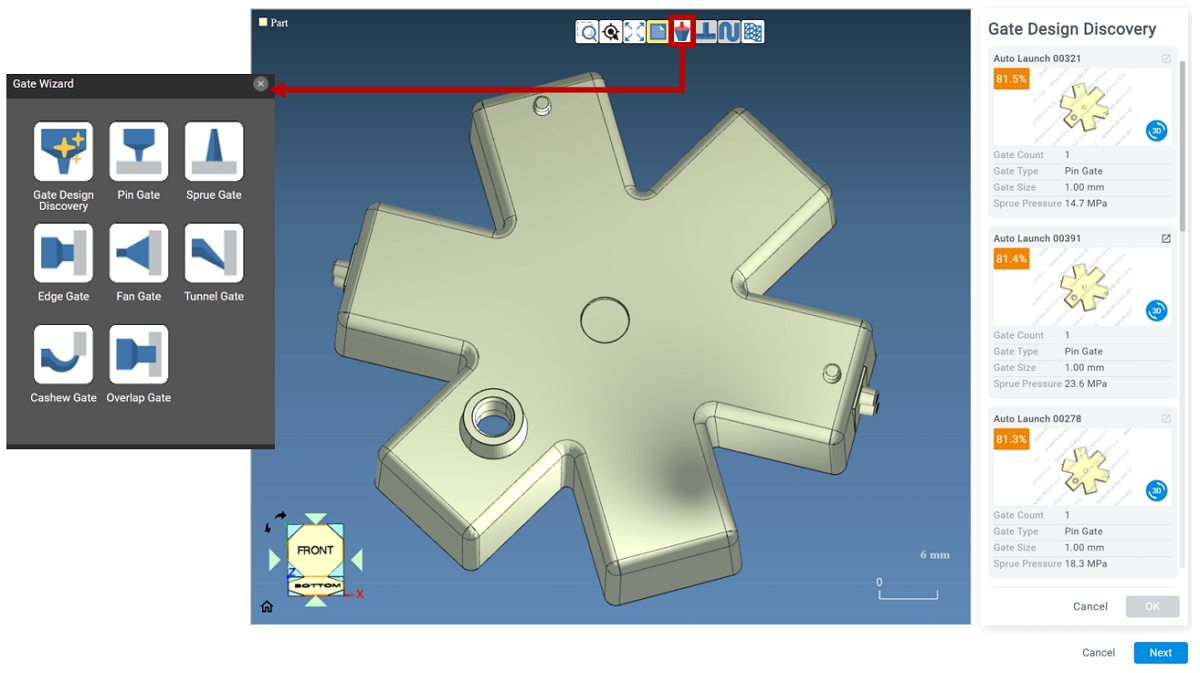
When using Gate Design Discovery for gate creation, the system automatically determines the optimal gate location based on similarity to other available simulations in the iSLM.
If users choose to set up the gate manually, it is necessary to click the Set Model Gate button on the worklist page and select the appropriate gate type and gate location in the Gate Wizard panel. At this step, users can still view the list of suggested gates through Gate Design Discovery to assist in design decisions.
Step 2: Upload Model File
After completing the general settings in the Auto Launch window, upload the model file in the CAD Model field. Please note that the file format is limited to STP or PRT. Users can upload multiple CAD model files simultaneously and specify gate settings and material selections for each file individually. Click Auto Launch to start the automatic project creation process.
Step 3: Monitor Creation Progress
After activating Auto Launch, users can view all notification messages during the project creation and analysis process in the Activity Center. These include model file upload status, gate construction status and analysis progress percentage, providing real-time information.
Step 4: Complete Automatic Project Creation
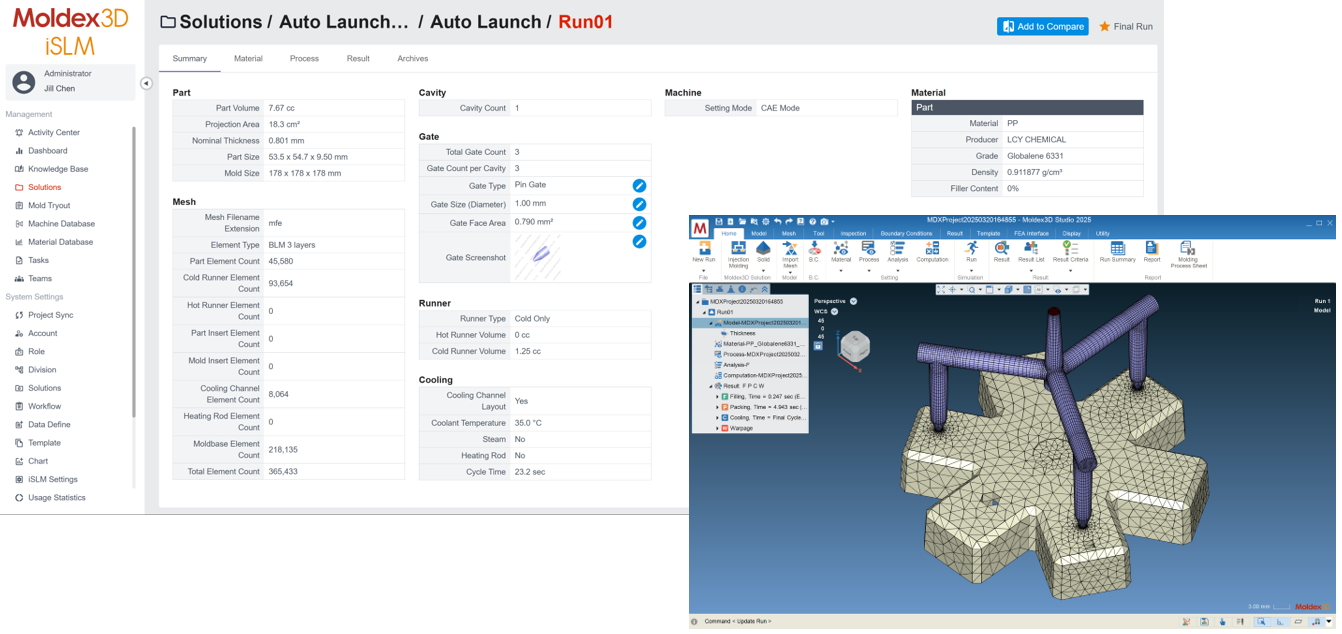
Once the system finishes the analysis, the project is automatically created, and users can directly view the detailed Moldex3D analysis results. Further modification can be carried out in Studio to optimize gate designs and molding parameters — boosting productivity through an automated workflow.