
Today’s Resin Transfer Molding (RTM) cases and composite product designs are getting more and more complicated. In order to meet the industry demands, Moldex3D has added features and adjusted the workflow for RTM simulation in the latest version R16.
First, complex layers attribute is added under New Run Wizard and Material Wizard in Moldex3D R16 so users will no longer have to repeat setting material properties for different layer orientations. Next, the new RTM workflow R16 will run the RTM pre-processing by adding a new setting wizard, called RTM Wizard. With RTM Wizard, users can assign material properties to different complex layers later in the early meshing stage. Moreover, in order to enhance usability, users can now add the most frequently used mesh tools to the RTM Wizard tab.
Also, the fiber orientation setting in R15 is according to the vector definition. Users then have to calculate the laying direction vector through trigonometric functions when the orientation is not parallel with the default axis. With R16, users can define both the base vector and angles in RTM Wizard. Finally, R16 Project can display the complex layer orientation; this allows users to review the settings when they go back to Project after setting the perform orientation. With all of the enhancement mentioned above, the setting workflow in Moldex3D R16 has become much more streamlined (Fig. 1).
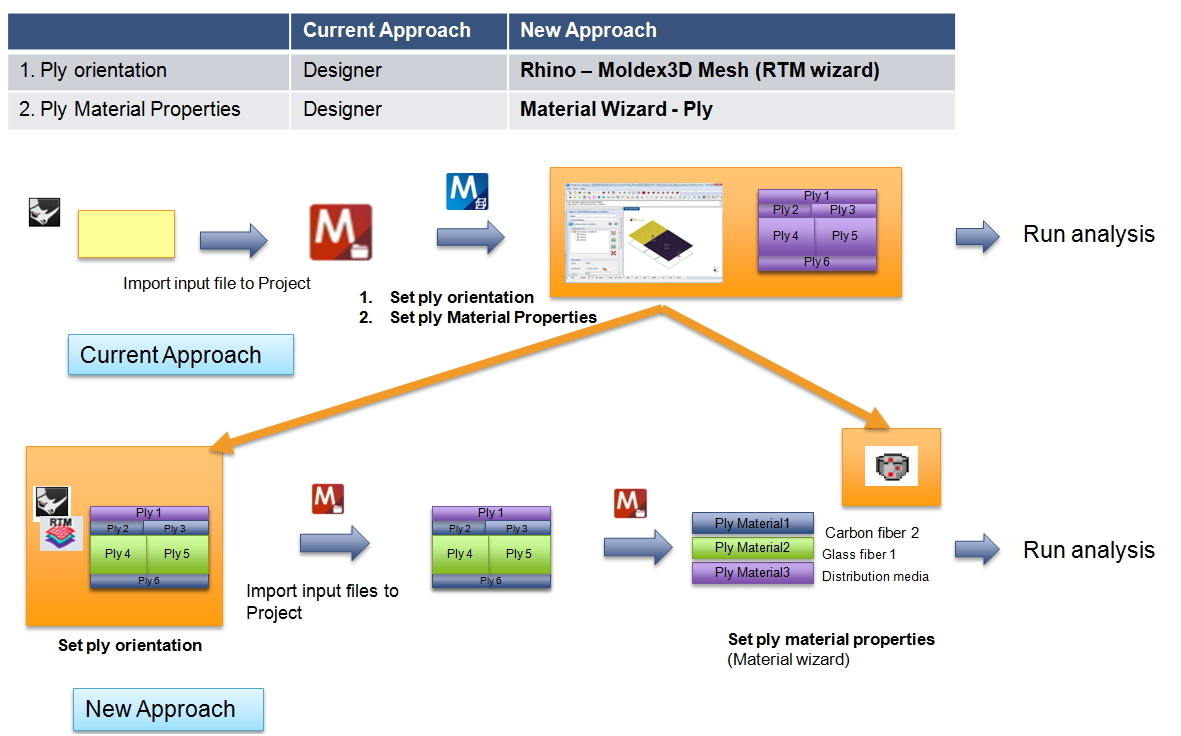
Fig. 1 Moldex3D R16 improvements streamlining the RTM workflow
The new RTM workflow is briefly introduced as the following: The first step is to build mesh and set orientation through RTM Wizard (Fig. 2), and then import the mesh and orientation data to Project (Fig. 3). Users then can check the orientation setting by displaying the orientation in Project (Fig. 4). Next, New Run Wizard provides complex layer property setting function at the materials property setting step (Fig. 5), and users can control component show/hide of complex layers through Model Manager to view designated layers in more clear details.
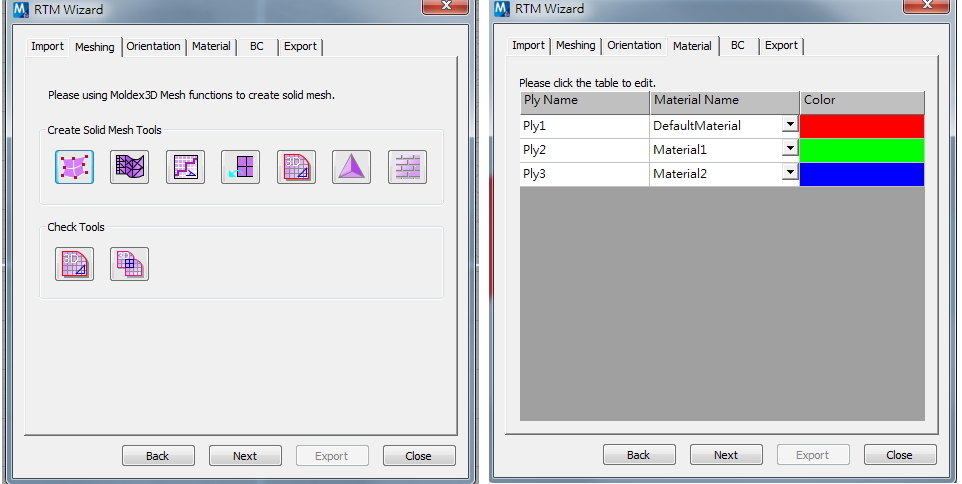
Fig. 2 RTM Wizard puts the frequently-used mesh tools in the tabs when setting up the process
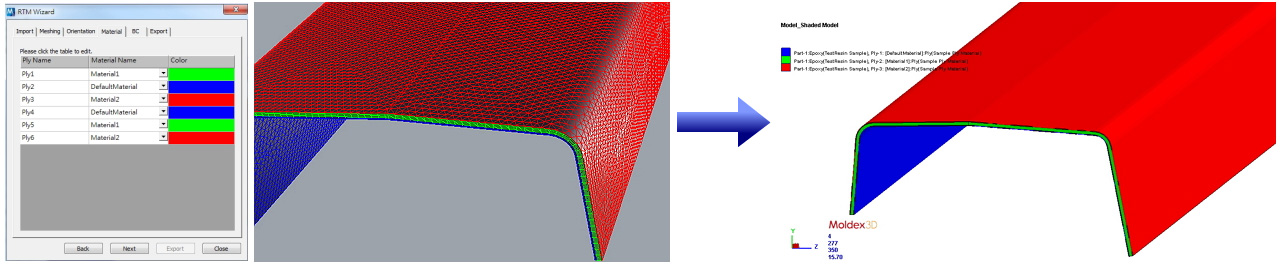
Fig. 3 Project can display the fiber orientations in different locations with the user-defined colors
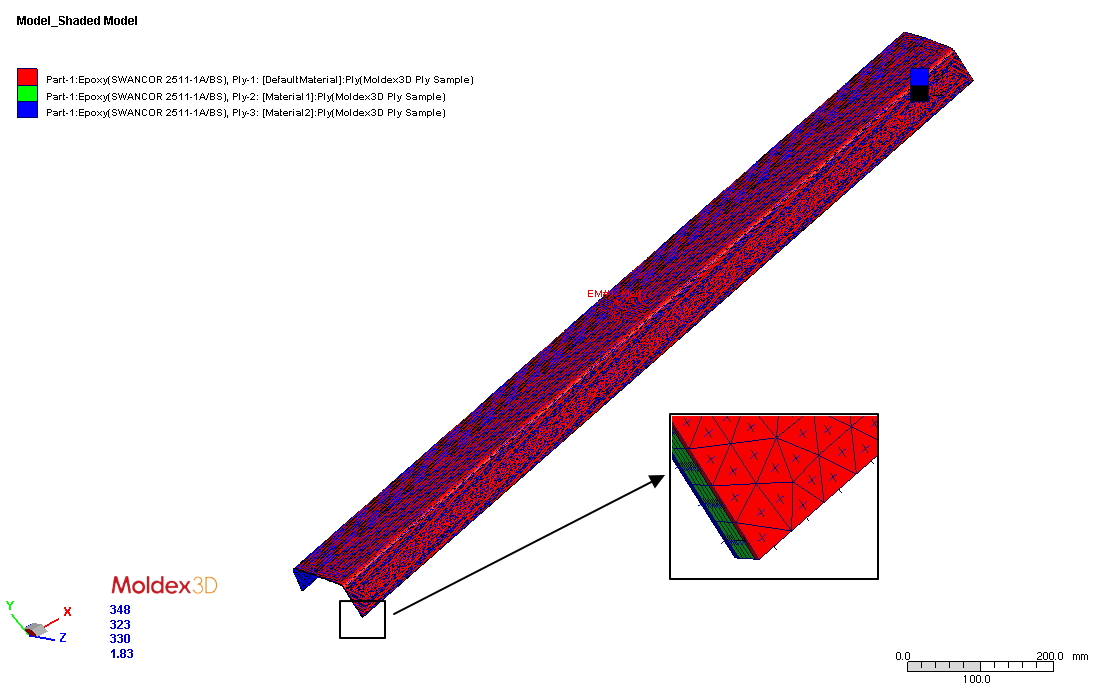
Fig. 4 Display function of the fiber orientation
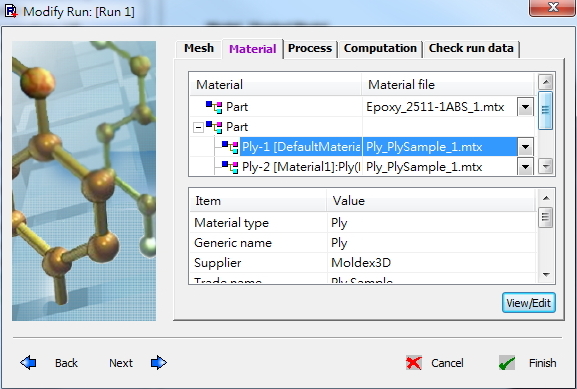
Fig. 5 New Run Wizard supports complex layer materials settings

Fig. 6 The show/hide functions of layers
Moldex3D R16 has significantly improved the RTM simulation workflow by streamlining the pre-processing workflow and providing a higher level of user-friendliness. These enhancements and improvements will allow Moldex3D users to increase simulation productivity, getting the most out of their RTM analyses.