Moldex3D’s pre-processing tools enable users to set venting. The main purpose of venting is to allow the air trapped during the injection molding process to escape and prevent surface defects, such as burning, flash, short shots and air traps, and severe volume shrinkage.
Importing curves in Moldex3D’s venting setting eliminates the need for manually selecting the venting boundary. It provides users with a more streamlined workflow, reducing time and effort. It only requires the following simple steps to complete the vent setting: Create venting curves → Set Moldex3D project → Set Computation Parameters → Set Venting (Import curves) → Save and complete. The following will demonstrate how to quickly and efficiently complete the venting design and setting in Moldex3D Designer.
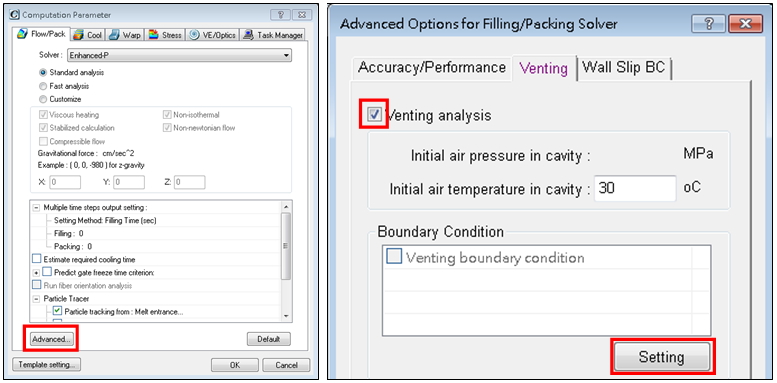
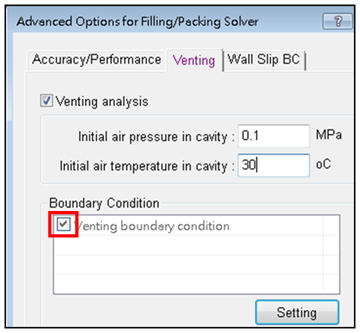
Step 1 In Moldex3D Computation Parameter, click Advanced and go to the Venting tab.
Step 2 Check Venting analysis and click Setting to launch workspace for B.C. setting.
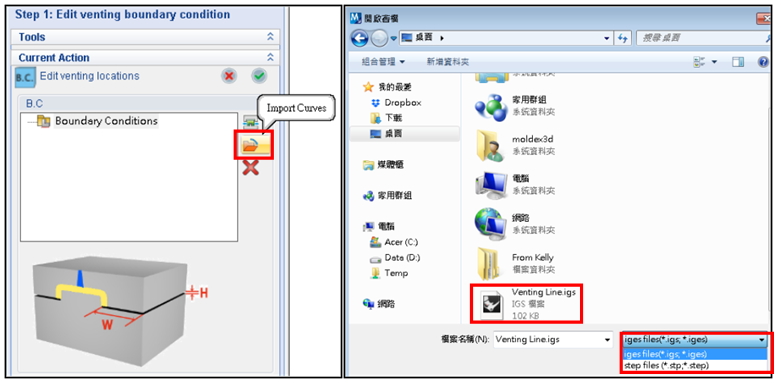
Step 3 Click Import Curves, select the venting boundary curve, and import it.
Note: venting curve (IGES/STEP file) is required.
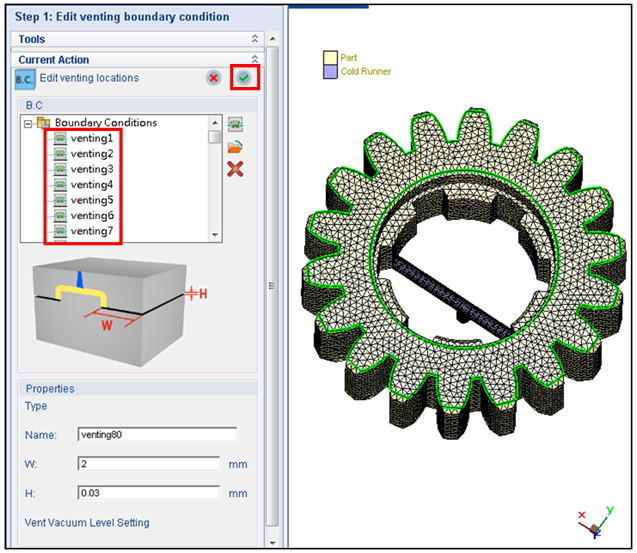
Step 4 Check if the imported venting boundary conditions are properly listed and shown in Display Window. Click OK and confirm to complete the BC setting.
Step 5 Once you have finished the BC setting, the option venting boundary condition in Computation Parameter will be automatically checked, and the analysis can be performed after all others settings are completed.
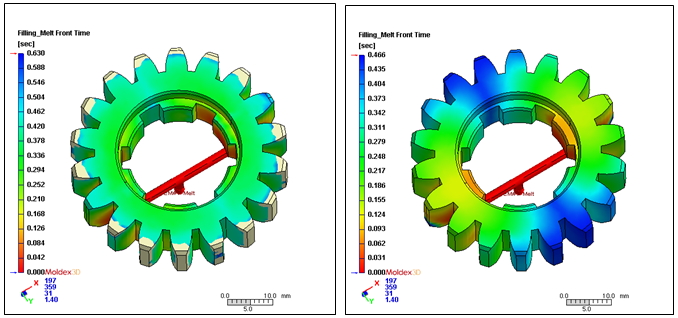
Step 6 After the analysis has finished, the results show that venting consideration greatly influences the flow pattern (check Venting analysis or not).